Active DirectoryWindows Server-Sistem Yöneticiliği
Creating a User Account in an Active Directory Environment
In this article I'll walk you through how to create a user account (or accounts) in Active Directory. Happy reading.

Mehmet Kadir CIRIK
Hello everyone. :)
In this article I’ll walk you through how to create a user account (or accounts) in Active Directory.
Happy reading.
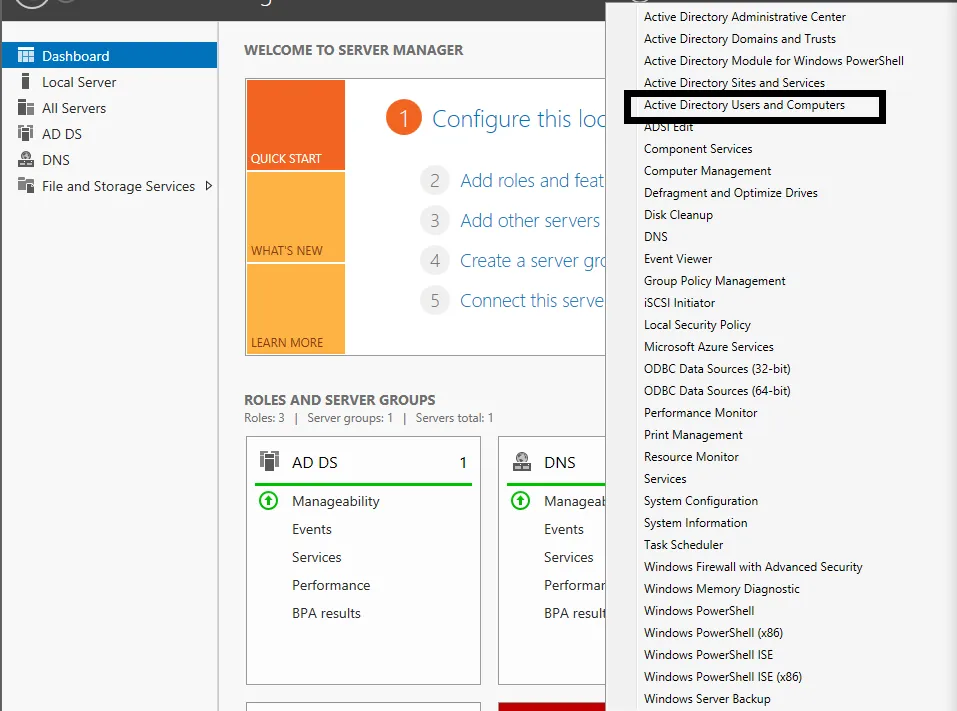
- To reach the Active Directory tab, simply click “Active Directory Users and Computers” under the Tools menu in the top-right corner.
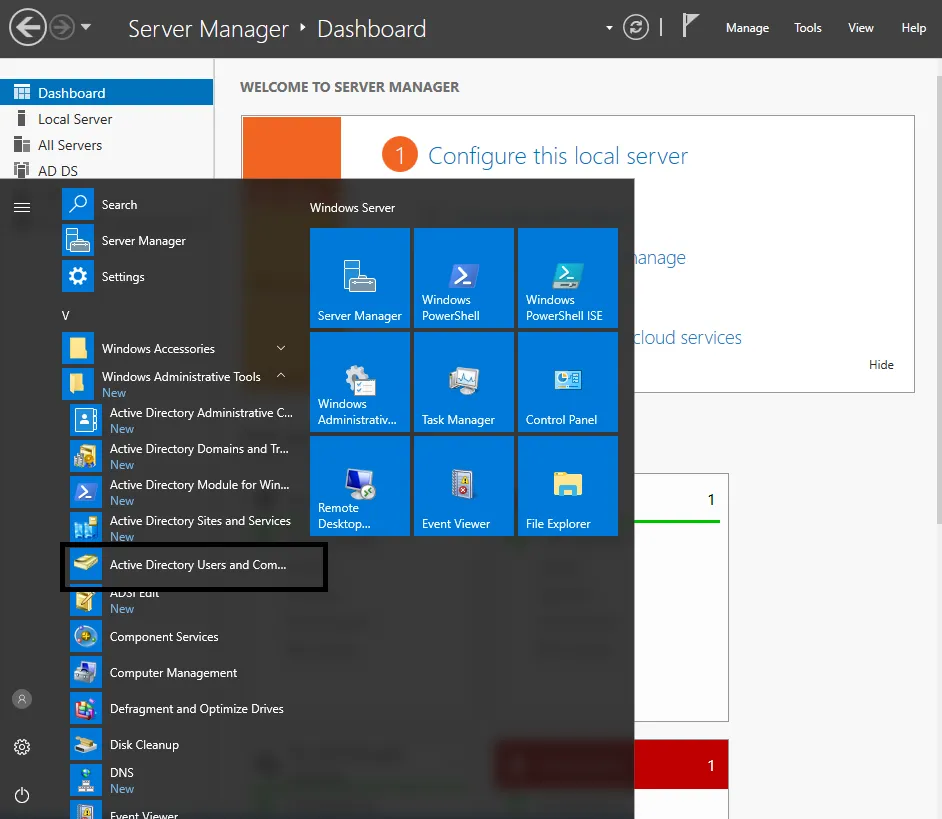
- Another way to open Active Directory is to follow Start > Windows Administrative Tools > Active Directory Users and Computers.
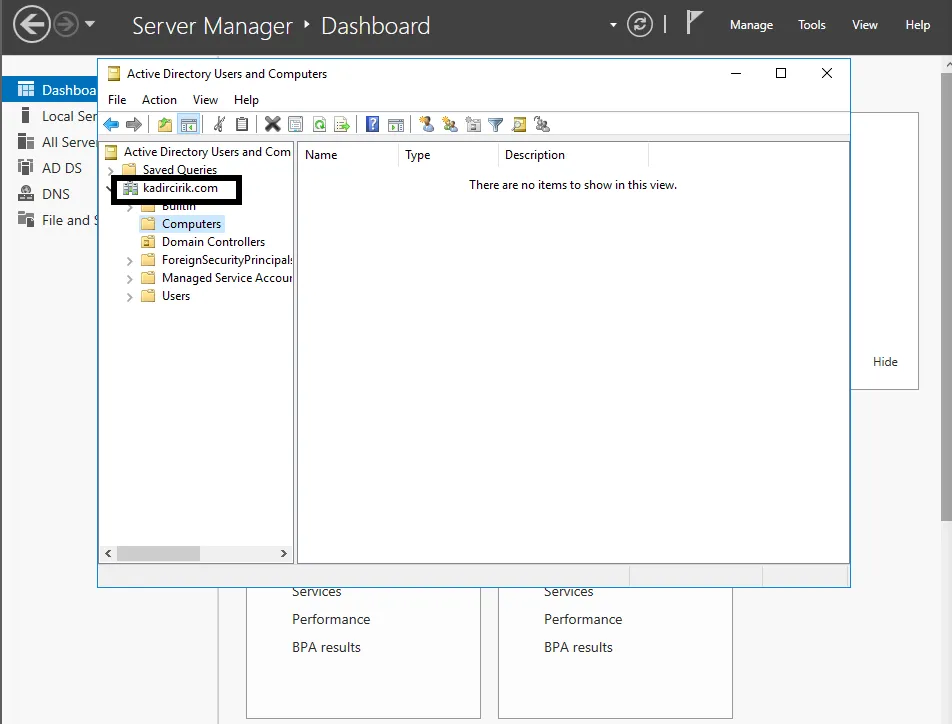
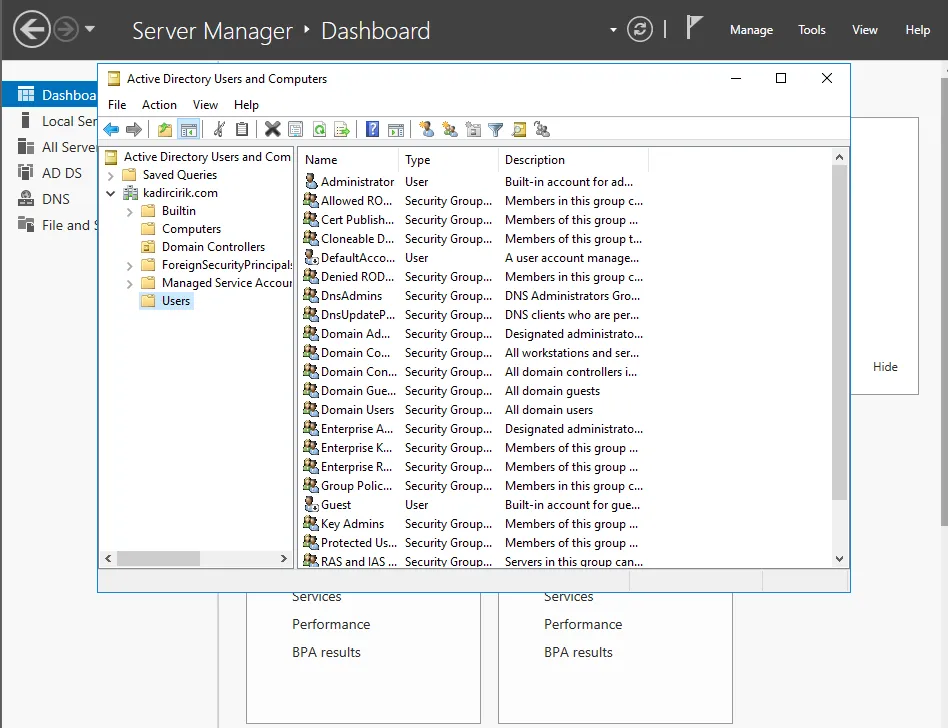
- We’re first greeted by a screen like this one. Here you can see the domain name. As shown, this domain contains a number of folders. These folders are what I referred to in earlier articles as “Organizational Units.”
- As you can see here, our “Computers” folder doesn’t have any computers in it yet.
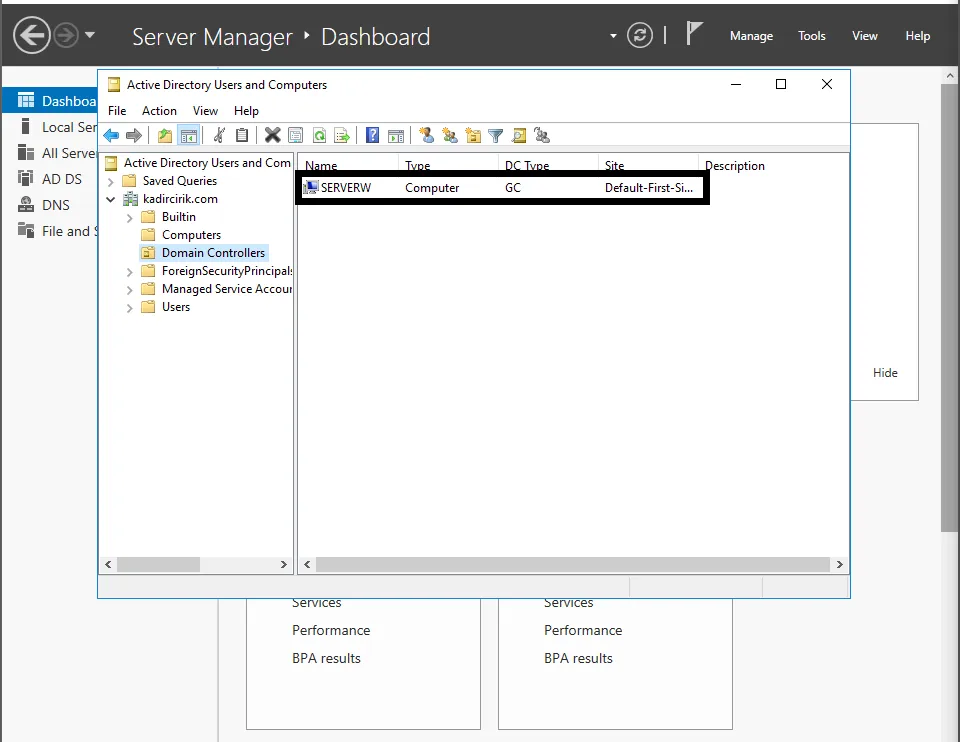
- Under the “Domain Controllers” folder of this domain, you can see a server I created earlier.
- Under the Users folder, you can see the users and groups laid out like this. You can tell users and groups apart by the little person icons next to them.
- You can also read their descriptions to get a better idea of what they do.
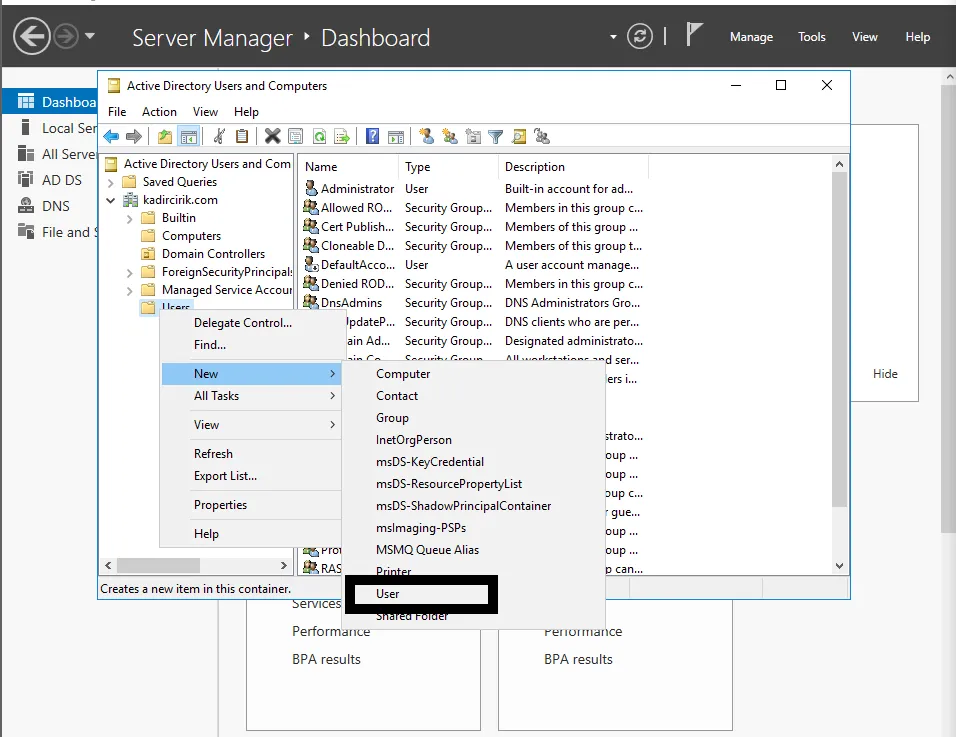
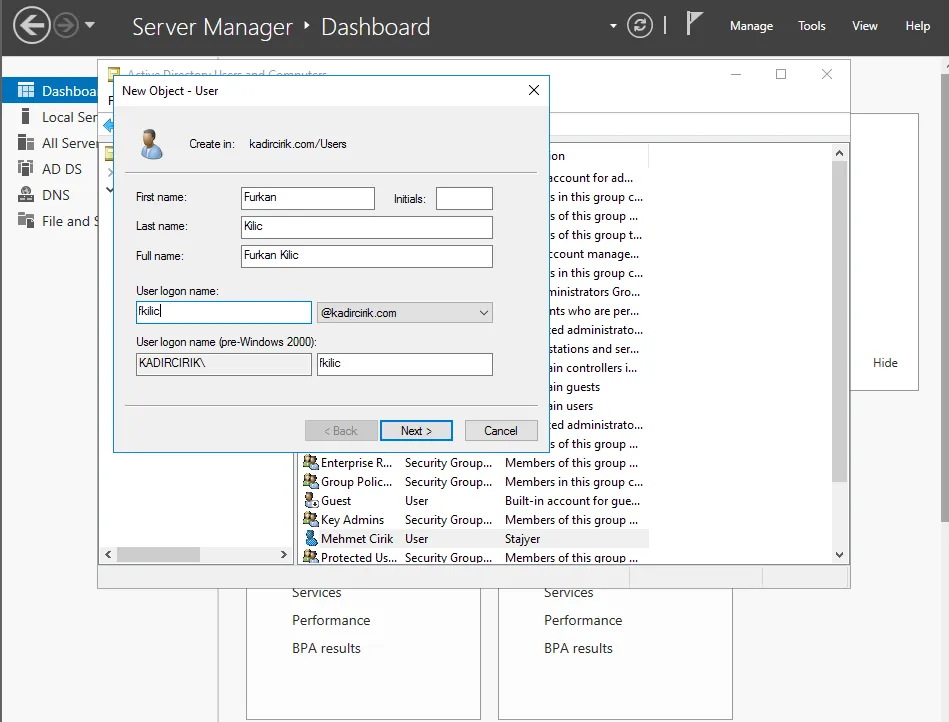
- Here, under the “Users” tab, we follow “right-click > new > user.”
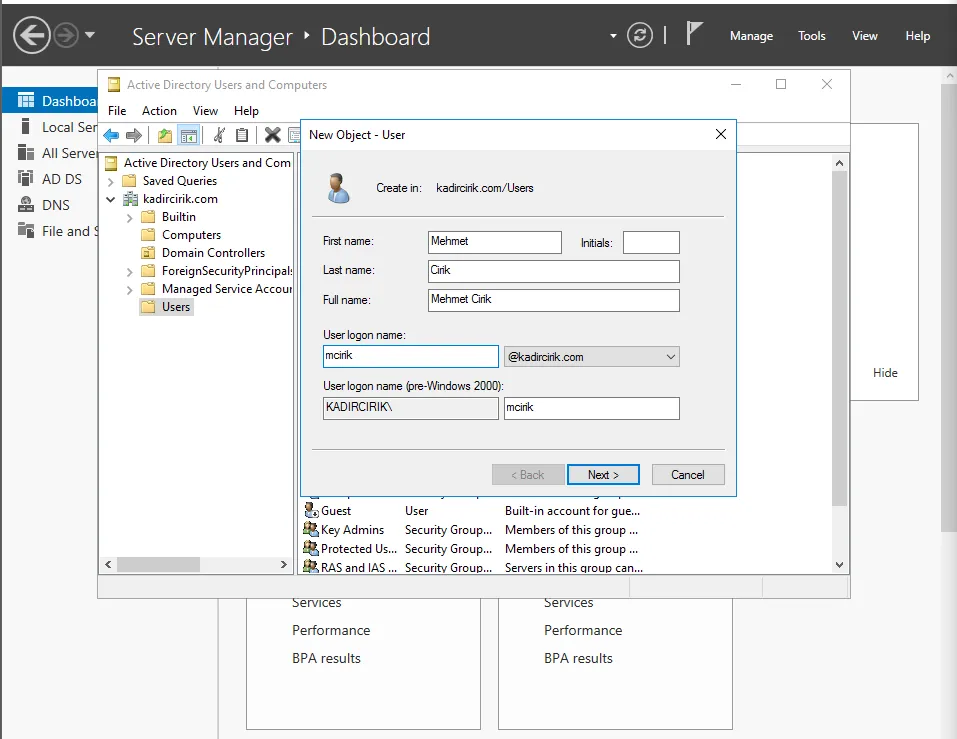
- On this screen we enter the details of the user we want to create.
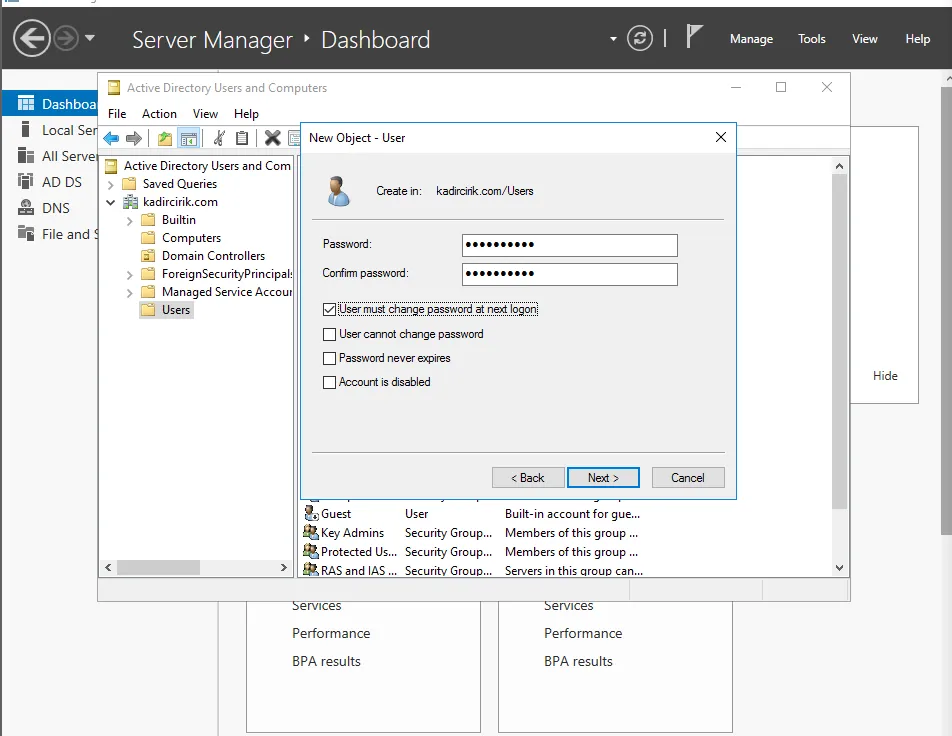
Here it asks us for a default password, which we enter. The options below have the following meanings:
- User must change password at next logon: Use this option if you want the user to set their own password the first time they log in.
- User cannot change password: Check this option if you never want the user to be able to change their password.
- Password never expires: Check this option for cases where you don’t want the user’s password to expire.
- Account is disabled: This option lets you disable the account.
- We click Finish to create the user.
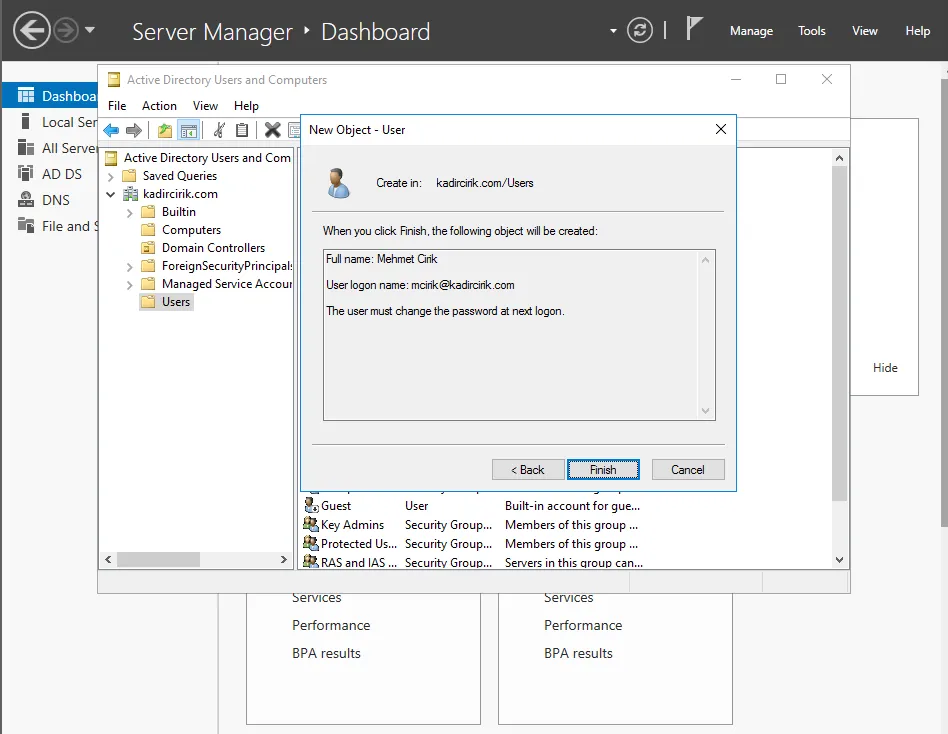
- Here you can see that the user has been created.
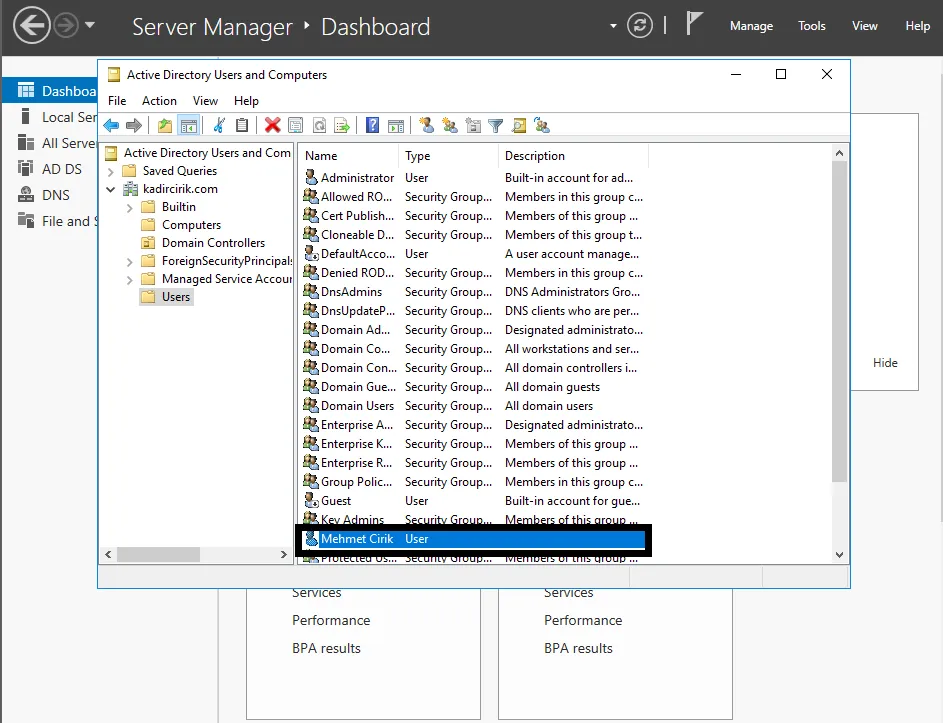
When we right-click the user and choose “Properties,” we can assign the user additional information. Some of the attributes we can assign here are:
- First name: The user’s first name (must be at most 28 characters).
- Last name: The user’s last name (must be at most 29 characters).
- Display name: The name formed by combining the first and last name. This is the name that appears in the Active Directory listing.
- Description: The field where the user’s role, rank, etc. is described.
- Telephone number: The user’s phone number. I entered a random number here.
- E-mail: The user’s email address.
- Web page: The user’s website address should be entered here.
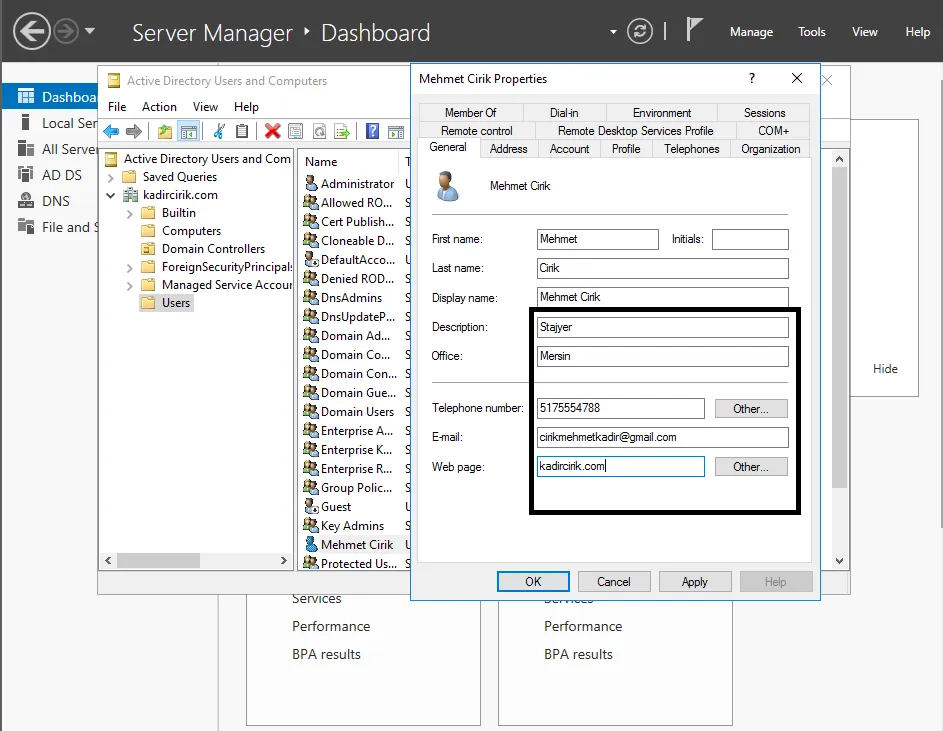
- Here you can see that the changes I made have been confirmed.
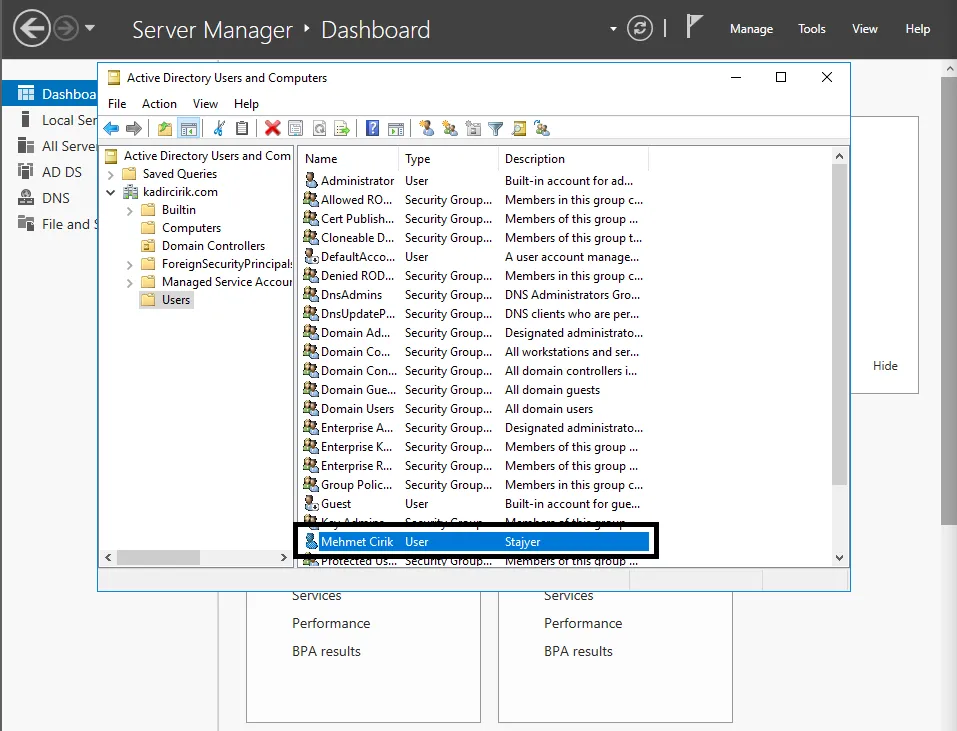
- Afterward, I created several more users. You’ll see why in my next articles.
Thanks for reading this far. :) See you in my next articles…