Installing and Configuring "Nginx" on Ubuntu 18.04
In this article, I'll go step by step through the following: Installing Nginx, Configuring the Firewall, Checking the Web Server, Managing the Nginx Service, Setting…

Hello everyone. :) In this article, I’ll go step by step through the following topics:
- Installing Nginx,
- Configuring the Firewall,
- Checking the Web Server,
- Managing the Nginx Service,
- Setting Up Server Blocks
Nginx Server is one of the most widely used web servers in the world, and hosts some of the highest-traffic websites on the internet. Compared to Apache, another popular web server, it’s more resource-efficient. You can find more detail on the differences between Nginx and Apache at this link. Lastly, Nginx Server can also be used as a reverse proxy.
1) Installing Nginx
In the rest of this article, I’ll configure the Nginx installation on Ubuntu 18.04.
- First, we update our packages.
- sudo apt update
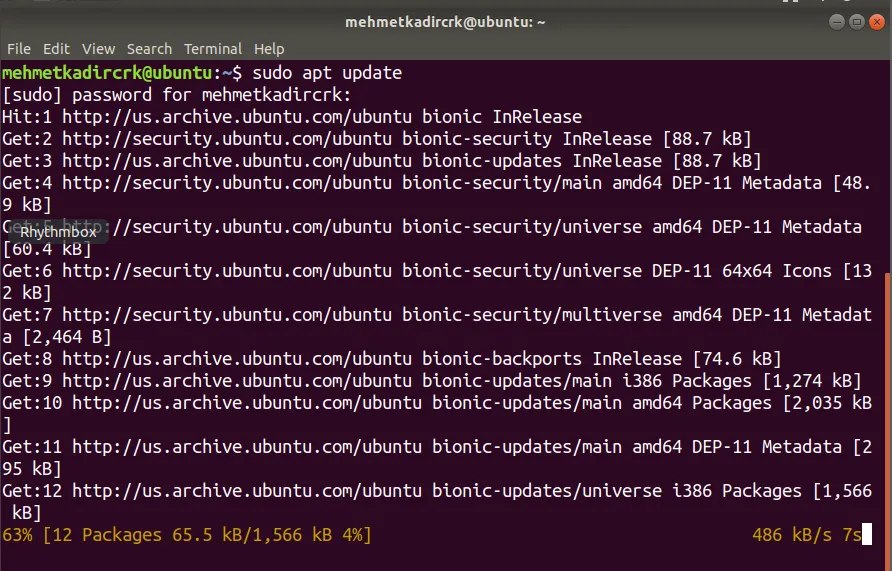
- Next, we install nginx as follows.
- sudo apt install nginx
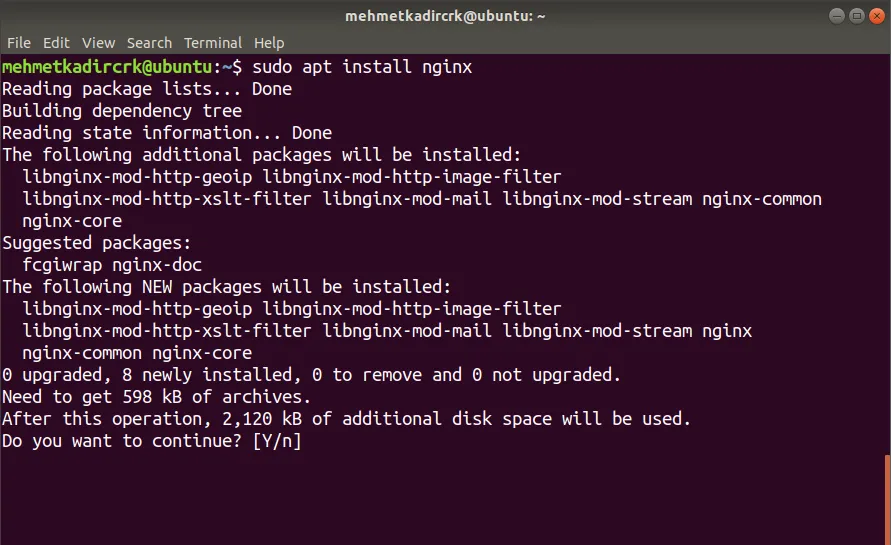
2) Configuring the Firewall
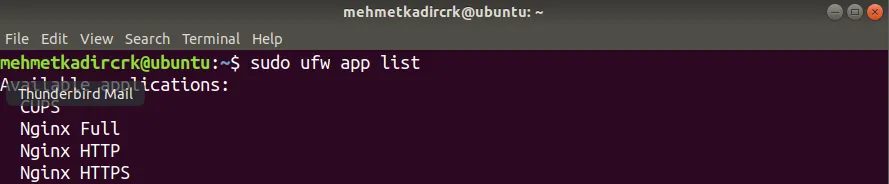
- We’ve now installed the server on our system in a very simple way. Now we need to do a port check. For this, we’ll use the following parameter,
- sudo ufw app list
- And as output, we should get a list like the one shown in the image.
- At this step, let’s allow and enable HTTP port traffic.
- sudo ufw allow ‘Nginx HTTP’

- Let’s verify the change we made, as follows.
- sudo ufw status

3) Checking the Web Server
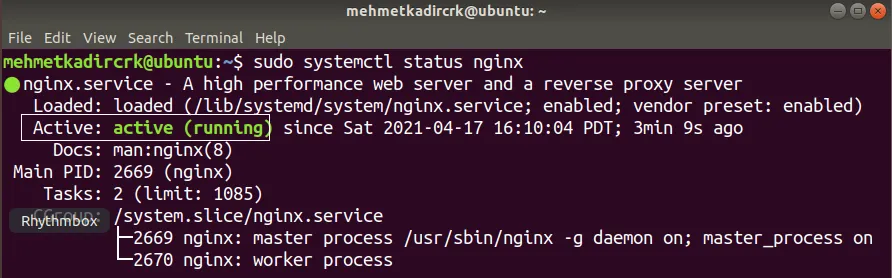
- To check that the “Nginx” service is running, we run the following parameter.
- systemctl status nginx
- And you can confirm it’s running from the active (running) output, as shown in the image.
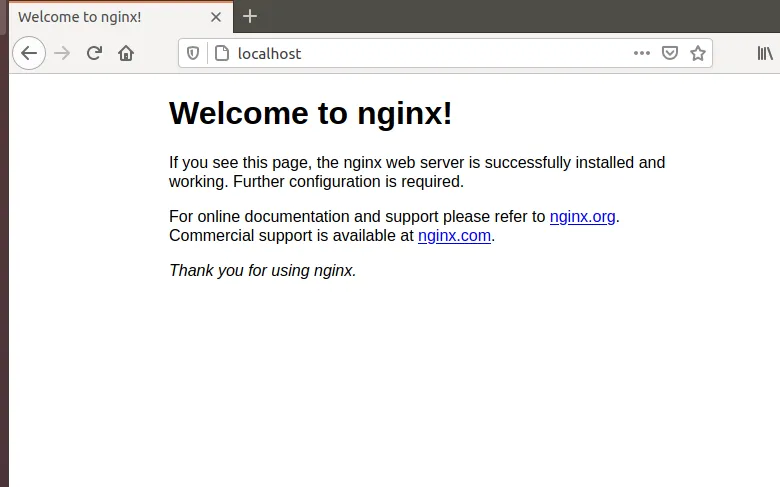
- To verify that Nginx is running correctly over IP, let’s access the default Nginx page,
- http://your\_server\_ip
- And we can confirm it’s working from the landing page shown in the image.
4) Managing the Nginx Service
In this section, I’ll cover some of the parameters used to manage the Nginx service.
- The following parameter is used to stop the Nginx service.
- sudo systemctl stop nginx

- The following parameter is used to start the service.
- sudo systemctl start nginx

- The following parameter is used to restart the service.
- sudo systemctl restart nginx

- The following parameter is used after making certain configuration changes to Nginx.
- sudo systemctl reload nginx

- By default, the Nginx service will start at boot. If you want to disable Nginx from starting at boot:
- sudo systemctl disable nginx

- And if you want to re-enable it:
- sudo systemctl enable nginx

5) Setting Up Server Blocks
When using the Nginx web server, server blocks (similar to Apache’s virtual hosts) can be used to change configuration details and host multiple domains from a single server. We’ll create a domain named kadirexample.com. However, if you have your own domain name, you can replace it with your own domain name.
By default, Nginx on Ubuntu 18.04 has a server block already enabled, configured to serve documents from a directory at that address. This works fine for a single site. If you want to host multiple sites here, things can get more complicated. Instead of changing this default block, I’ll create a /var/www/html directory structure for our kadirexample.com site.
- First, let’s create the required root directory for kadirexample.com as follows:
- sudo mkdir -p /var/www/kadirexample.com/html

- Then let’s assign ownership of this directory using the $USER variable.
- sudo chown -R $USER:$USER /var/www/kadirexample.com/html

Umask: On Linux operating systems, this is the default permission level assigned by the system to every file and directory.
- You can confirm your Umask value has changed by running the following:
- sudo chmod -R 755 /var/www/kadirexample.com

- At this step, let’s create a sample page using index.html.
- nano /var/www/kadirexample.com/html/index.html

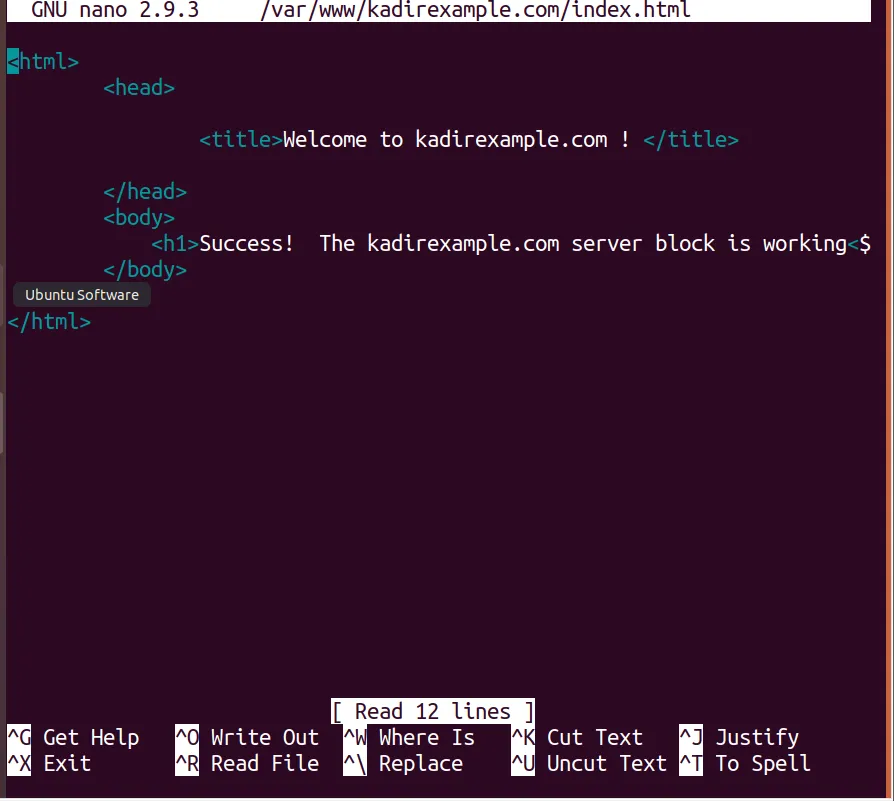
- Let’s add the following HTML code into the editor that opens with index.html.
-
Welcome to kadirexample.com! Success! The kadirexample.com server block is working!
- After that, you can save the file and exit.
- For Nginx to serve this content correctly, we need to create a proper server block. Instead of modifying the default block directly, I’ll create a new one as follows:
- sudo nano /etc/nginx/sites-available/kadirexample.com

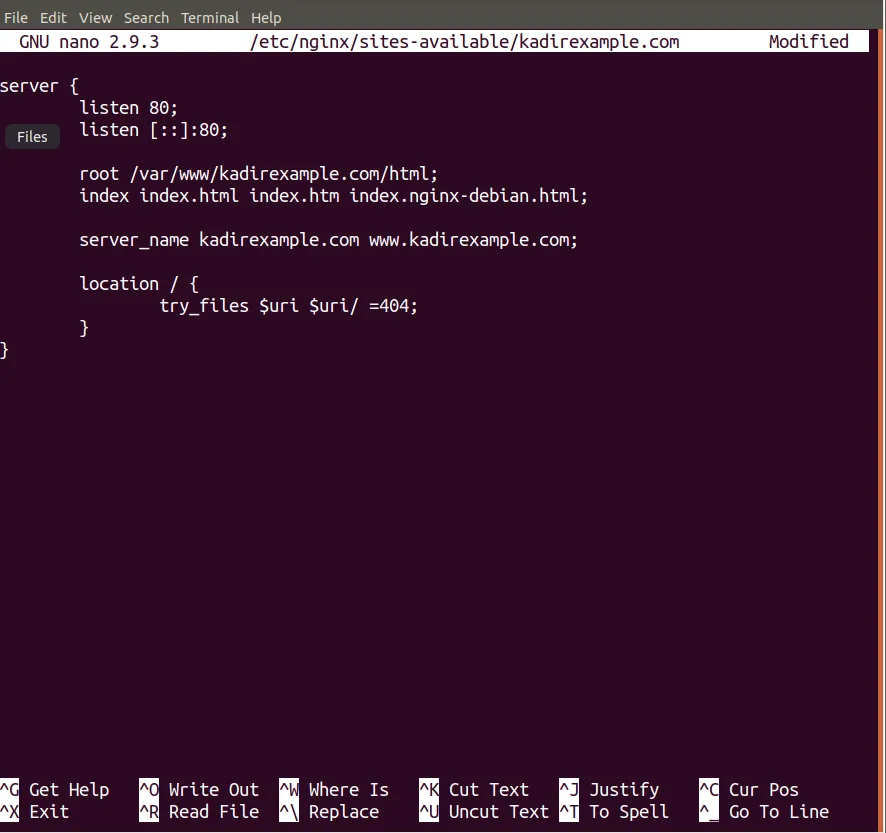
- And paste the following into the configuration block that opens:
server { listen 80; listen [::]:80;
root /var/www/kadirexample.com/html;
index index.html index.htm index.nginx-debian.html;
server_name kadirexample.com www.kadirexample.com;
location / { try_files $uri $uri/ =404; } }
- Next, let’s create a link in the directory Nginx reads at startup, and enable it.
- sudo ln -s /etc/nginx/sites-available/kadirexample.com /etc/nginx/sites-enabled/

Here’s a quick summary of what we did:
- kadirexample.com: will respond to requests coming to kadirexample.com and www.kadirexample.com.
- default: responds, over port 80, to any requests that don’t match the other two blocks.
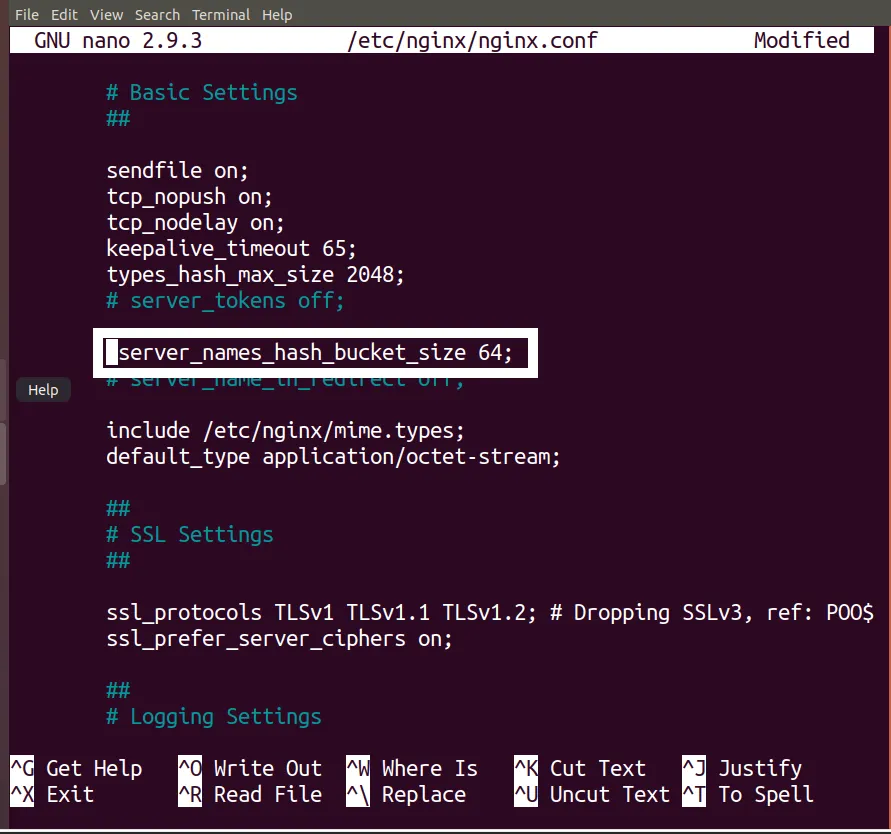
- To prevent a possible hash bucket issue that could result from adding extra server names, a single value needs to be set in the nginx.conf file. Let’s open that file:
- sudo nano /etc/nginx/nginx.conf

- In the directive that opens, we remove the # symbol at the start of the boxed line.
- Then, to make sure there’s no syntax error in our Nginx file:
- sudo nginx -t
- As a result, we should get output like the following.

That covers what we needed to know about configuring Nginx Server. Finally, to apply the changes you made, we restart Nginx using the parameter I mentioned above.
Thanks for reading this far. :)