Windows Server-Sistem Yöneticiliği
Creating and Examining Group Policy
When we hear Group Policy, the first thing that should come to mind is restrictions. This console is where restrictions are assigned to the computers and…

Mehmet Kadir CIRIK
Hello everyone. :)
When we hear Group Policy, the first thing that should come to mind is restrictions. This console is where restrictions get assigned to the computers and users in our domain. It’s not just restrictions, though — you can also assign many administrative tasks remotely through Group Policy.
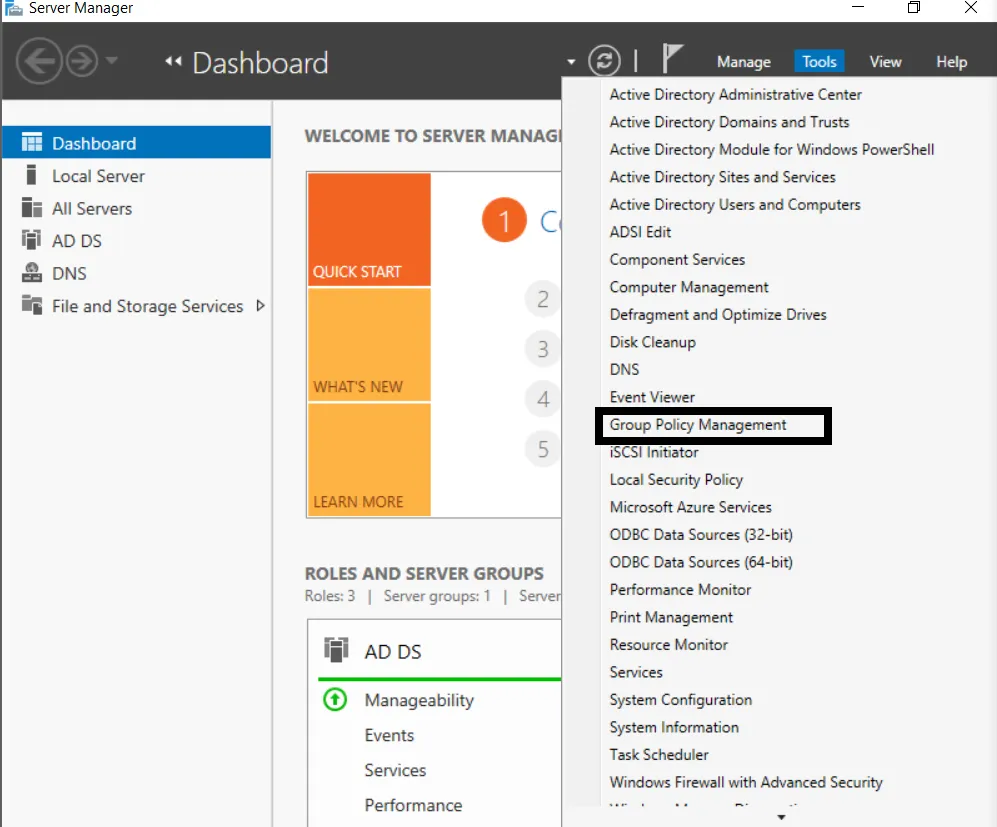
- Let’s first open our “Group Policy Management” panel. You can reach this panel by clicking Group Policy Management under the Tools tab.
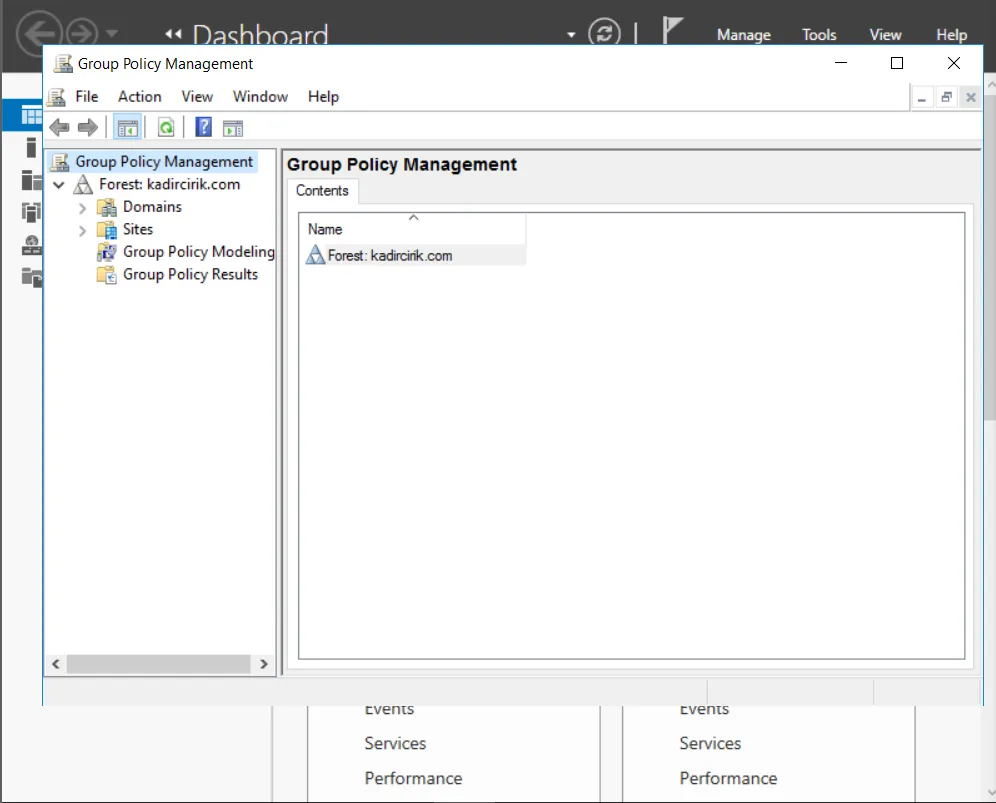
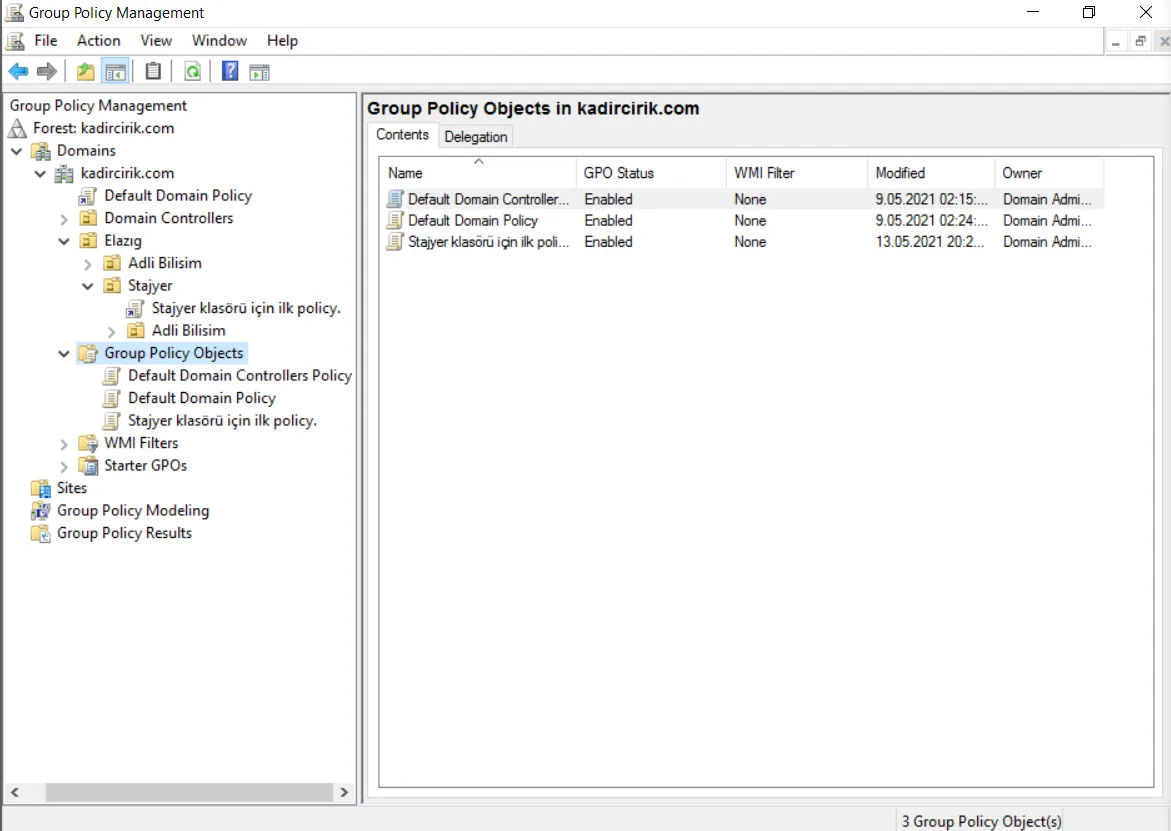
- As you can see in the image below, our panel has opened.
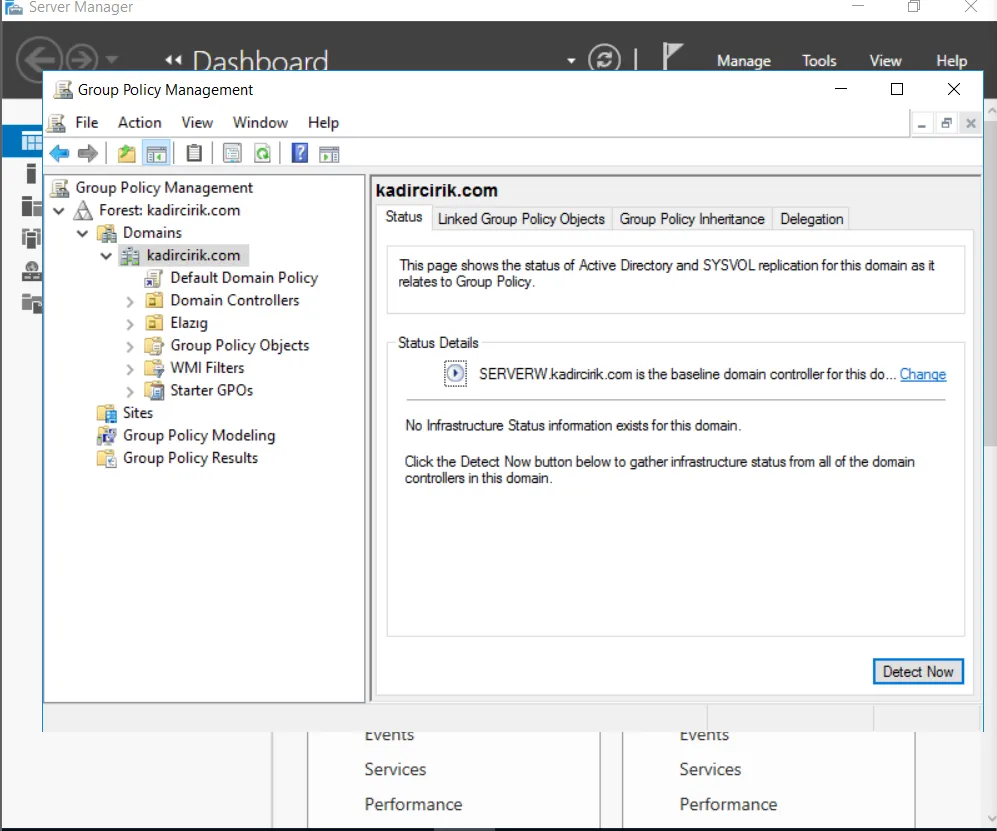
- Here you can see the folders we previously created under our “kadircirik.com” domain.
- From this we can draw the following conclusion: Group Policy can reach all the folders we previously created in Active Directory. We can assign restrictions to these Organizational Units in the following categories:
- Domains: Or we can assign the restriction directly to the entire kadircirik.com domain. If restrictions are assigned at the domain level, every user and computer in that domain is affected by them.
- Organizational Units: This is where a restriction we want to assign is applied to a specific folder.
- Domain Controllers: We might have Domain Controllers in different cities or countries. This is used when we want to assign different restrictions specifically to the Domain Controllers in those different locations.
- Sites: Sites can be offices under the same Domain but in different physical locations. When these offices are physically located in different places, this is called a “Site.” In other words, wherever there’s a physical, location-based separation, it falls at the site level. For example, all of an organization’s offices in different cities are listed as sites, and restrictions are assigned from there.
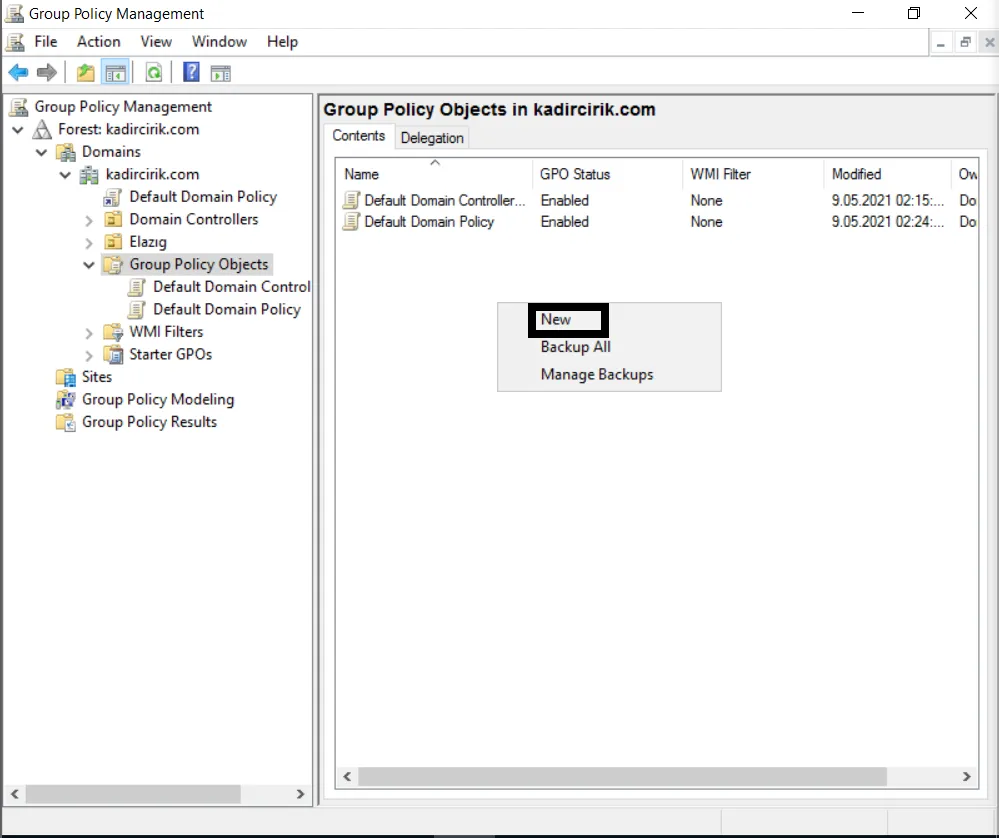
- To assign our restrictions, we click on the “Group Policy Objects” section. Here we see 2 policies that the system created by default. These are:
- Default Domain Controllers Policy: Contains the list of restrictions assigned to Domain Controllers.
- Default Domain Policy: Contains the list of general restrictions assigned to the entire Domain.
To create a Policy, we proceed as follows. By the way, a Policy can be created in two ways. I’ve covered both of them in the rest of this article.
- We click “right-click>new”.
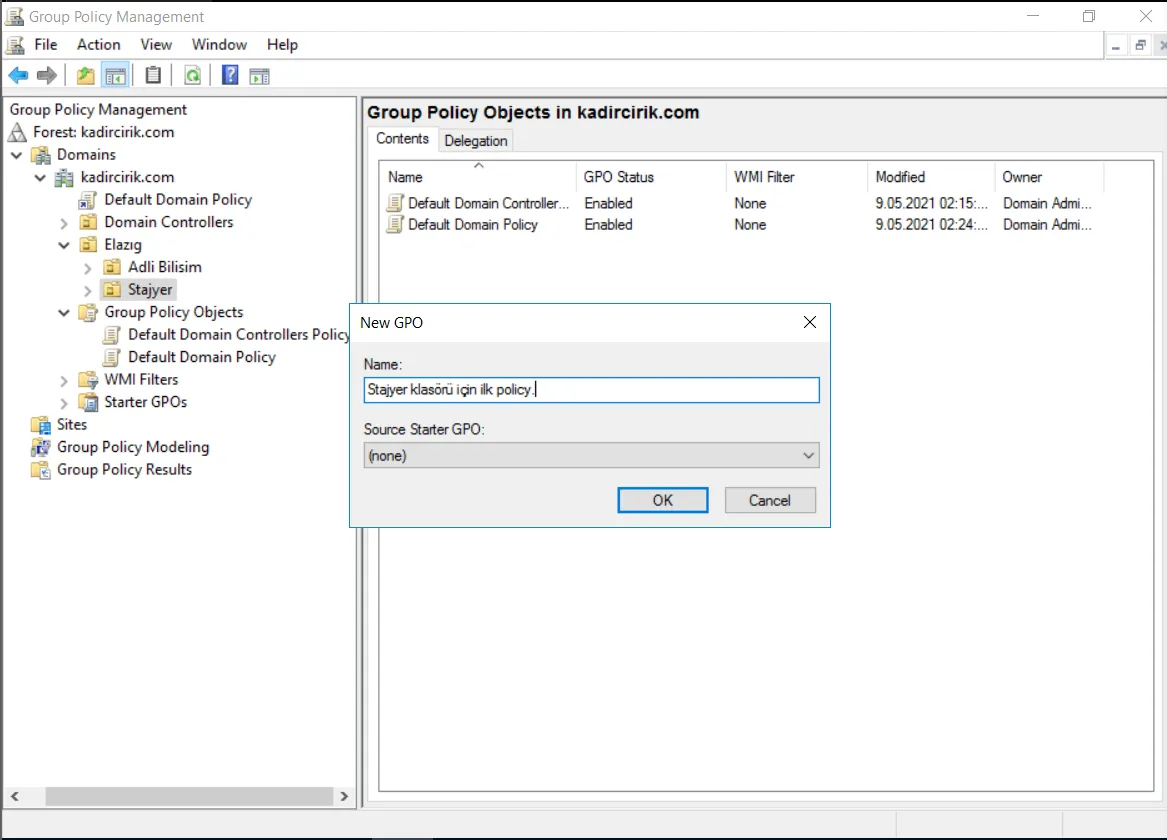
- Here we give the Group Policy a name. I named mine “First policy for the Stajyer folder.”
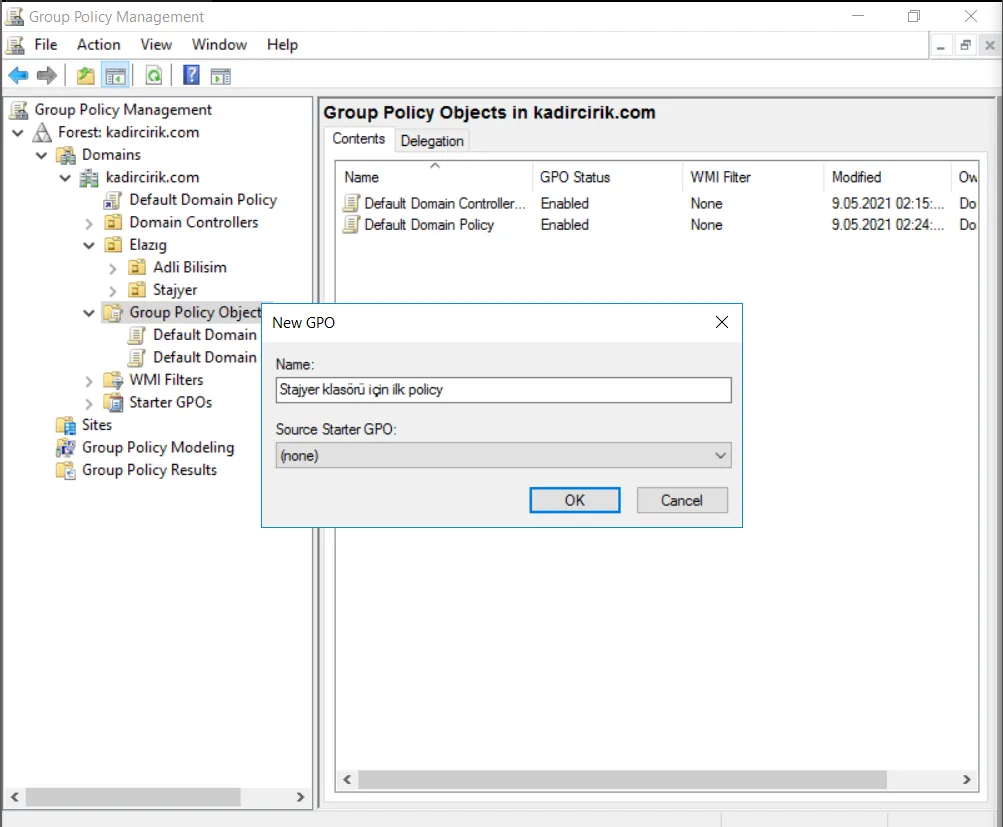
- As you can see, the Policy has now been created as shown. We’ve created this Policy but haven’t linked it to any section yet. I’m going to link it to the Stajyer folder.
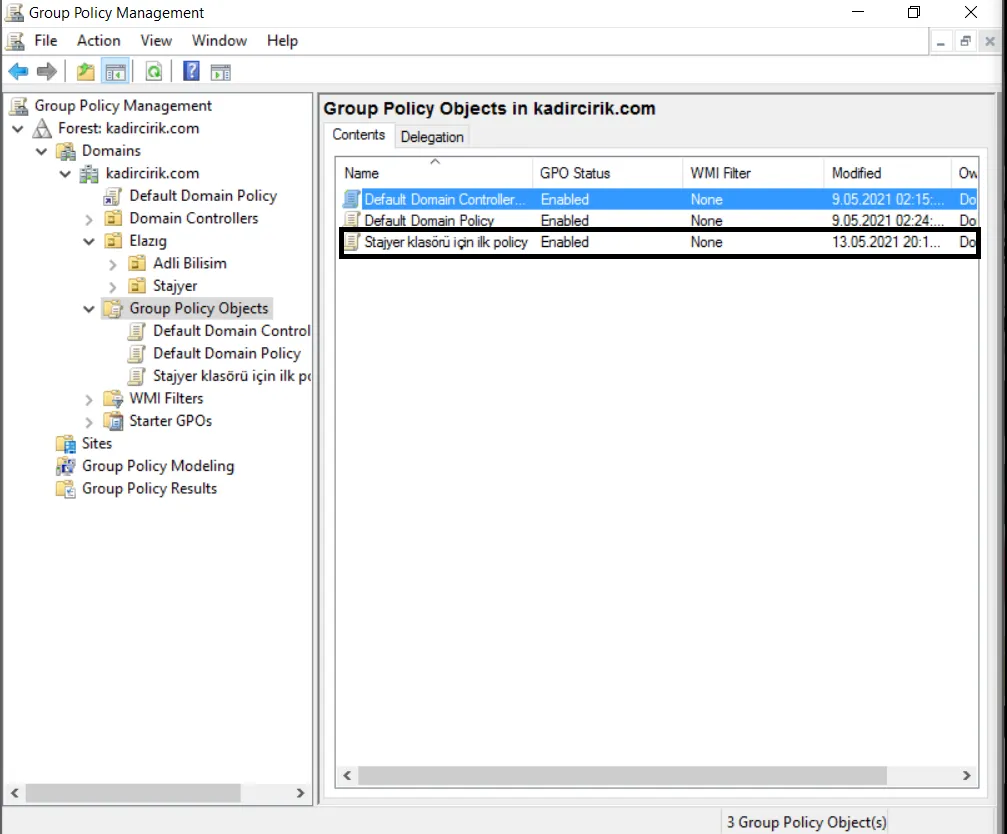
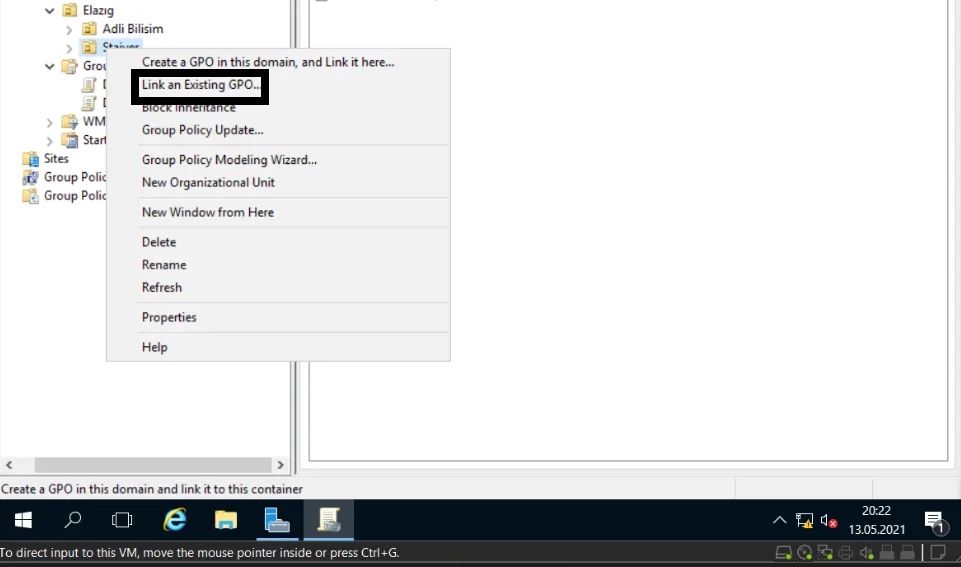
- To link it to the Stajyer folder, we go to that folder and choose “right-click>Link an Existing GPO…”, i.e., link an existing GPO.
- Then we choose which GPO we want to link. I select the Policy I created.
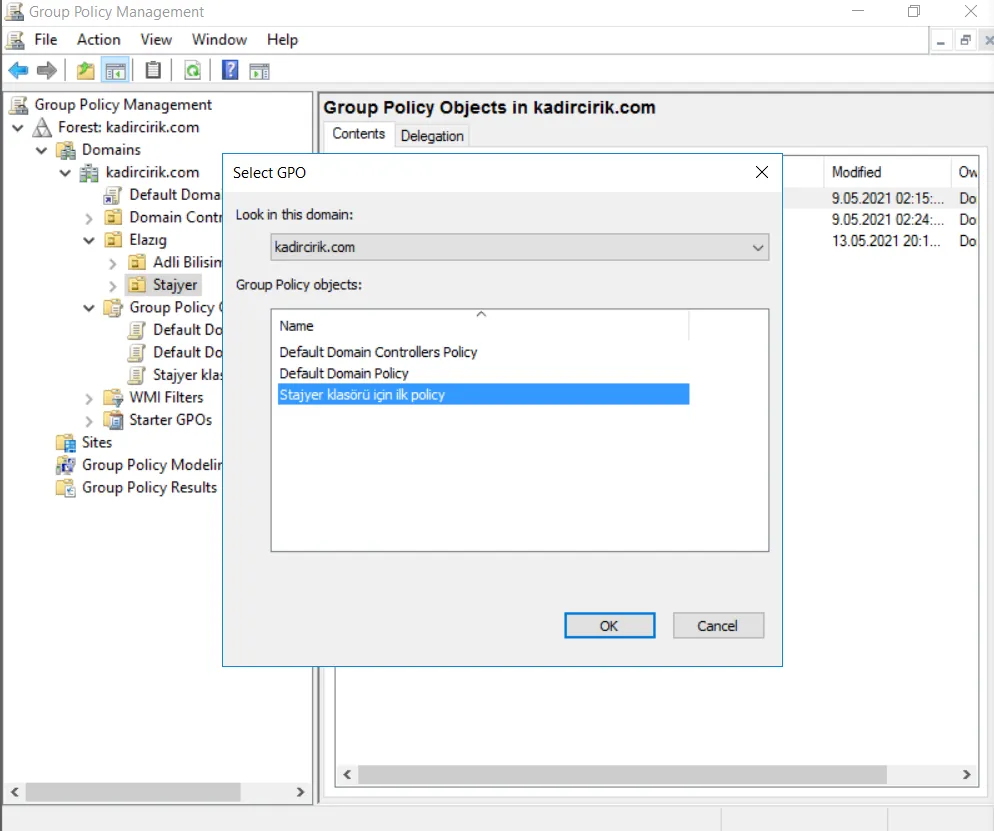
- As you can see, the Policy we created now appears under the “Stajyer” folder. All the restrictions and administrative tasks we assign through this Policy will affect the users and computers under the Stajyer folder.
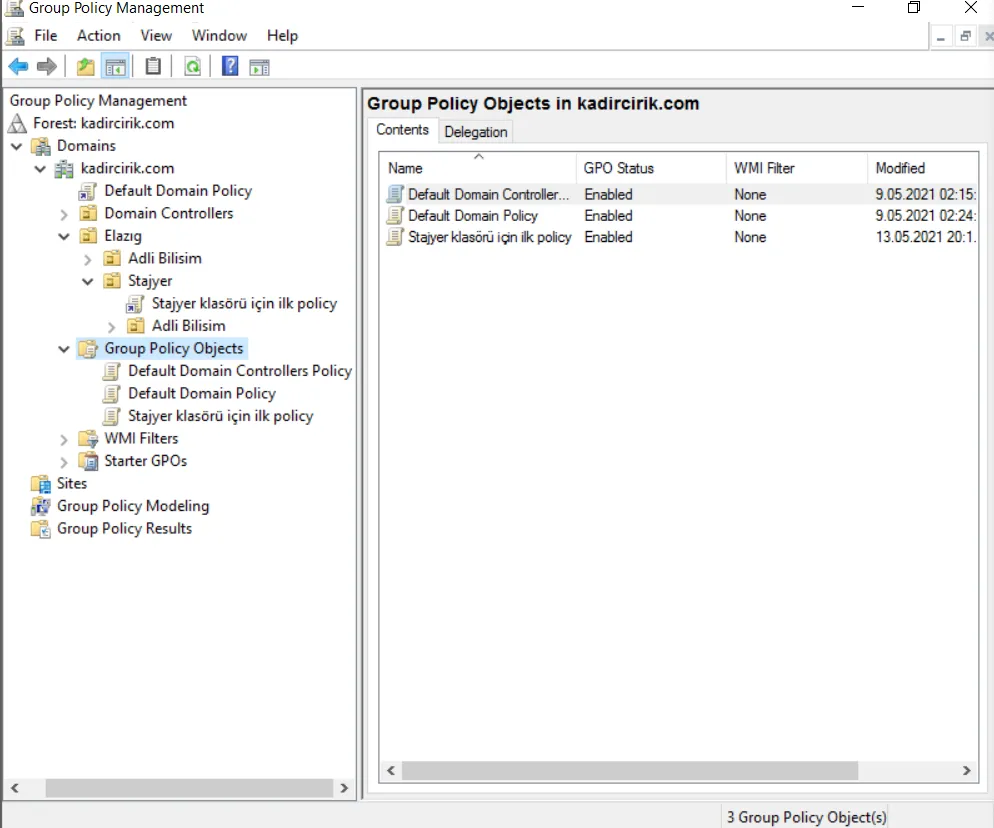
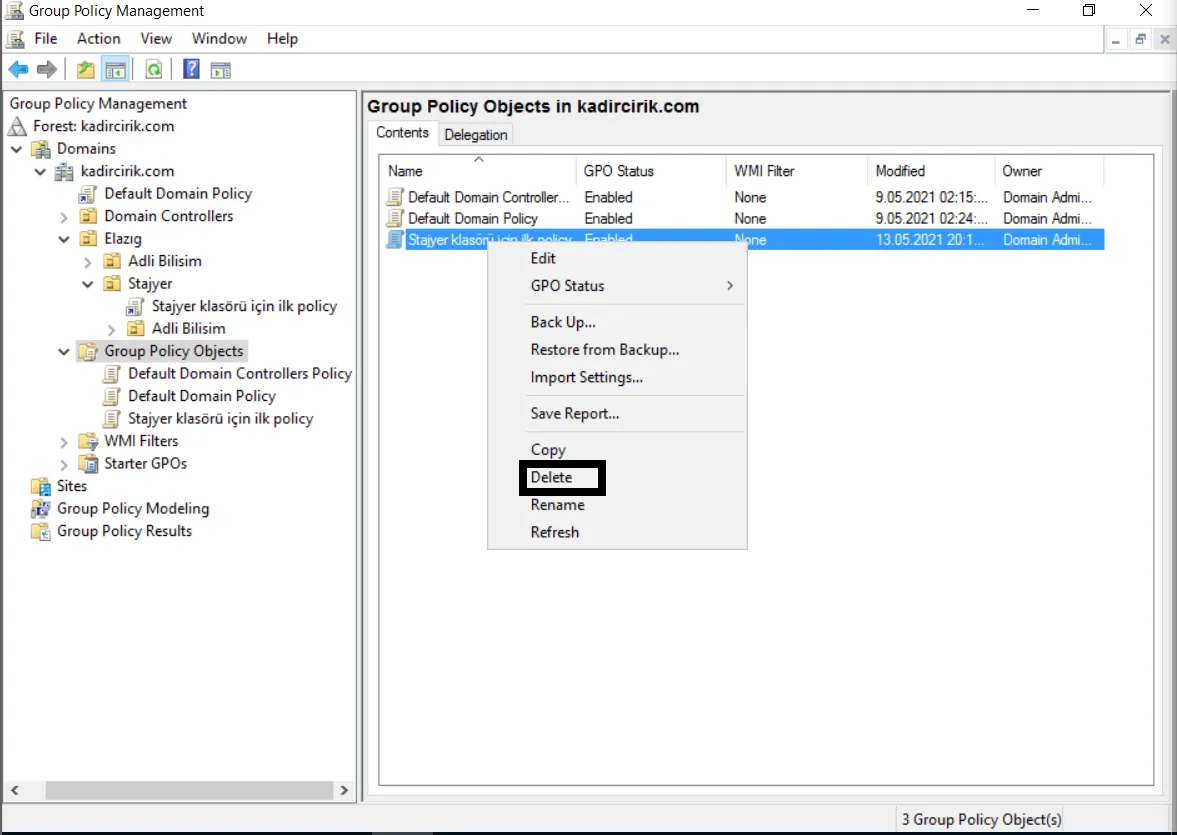
- Here, to demonstrate the other way of creating a Policy, I’m deleting my Policy by choosing “right-click>delete”.
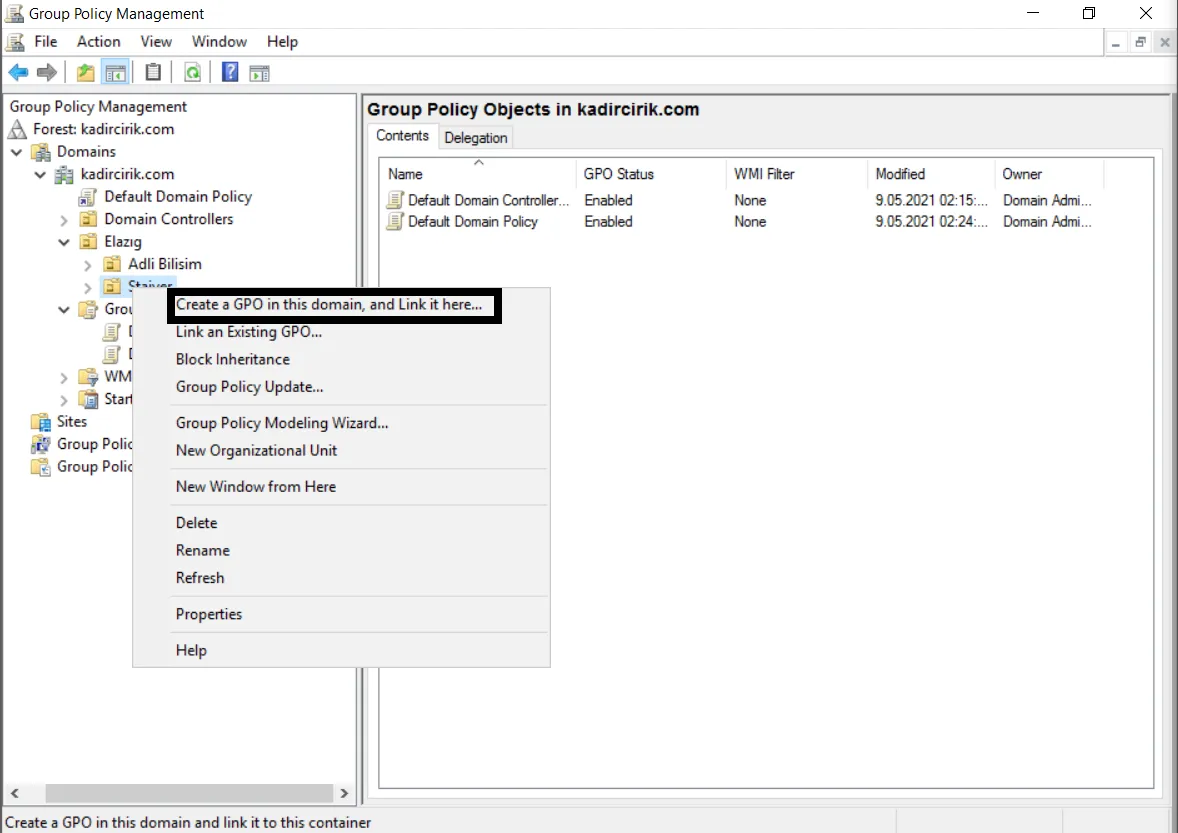
- As a second step, to create a Policy directly on the Stajyer folder, we choose “right-click>Create a GPO in this domain, and Link it here…”, meaning create a Group Policy and link it here, in short.
- Again, we give it a name in the same way.
- And as you can see, the Policy was created and automatically linked to the Stajyer folder. You can use whichever approach you prefer here.
In my next article, we’ll define restrictions on top of the Group Policies we’ve created here.
Thanks for reading this far. :)