Assigning Restrictions to Users with Group Policy
In my previous article, we created a Group Policy. However, we hadn't defined any restrictions on it. In this section, we'll define a restriction inside the Group Policy…

Hello everyone. :)
In my previous article, we created a Group Policy. However, we hadn’t defined any restrictions on it. In this section, we’ll define a restriction inside the Group Policy we created. In this article, I’ll create a Group Policy and use it to prevent a selected user of mine from seeing their Local Disk (C:).
I hope this is easy to follow. Happy reading.
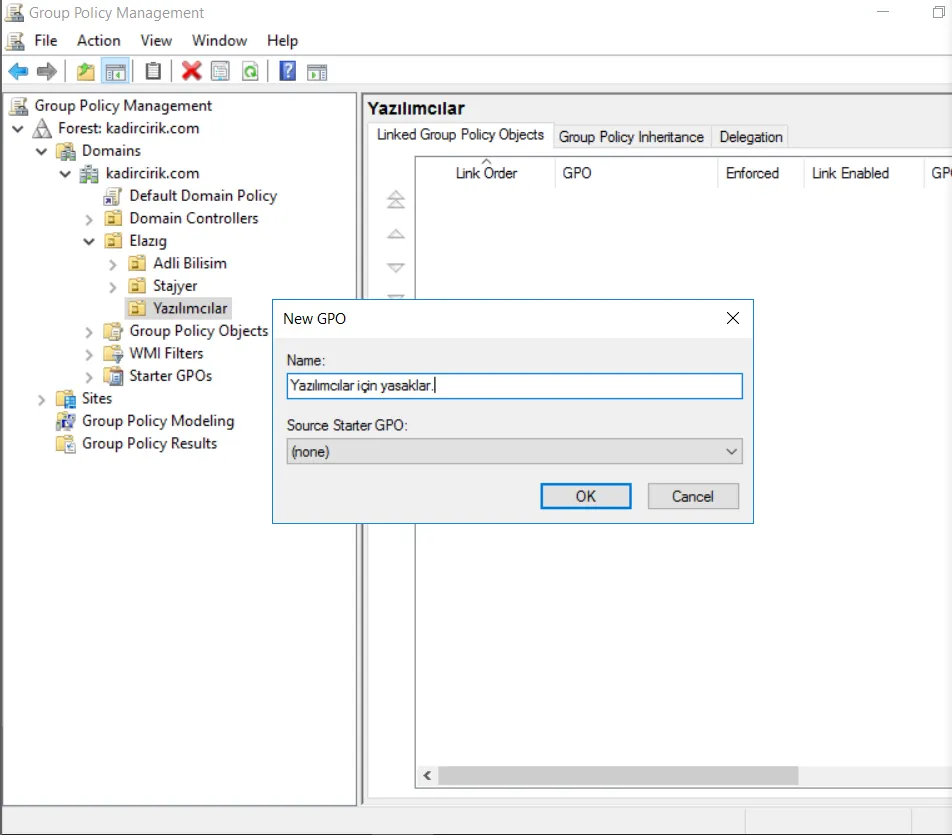
- First, I create a Group Policy Object for the Developers folder.
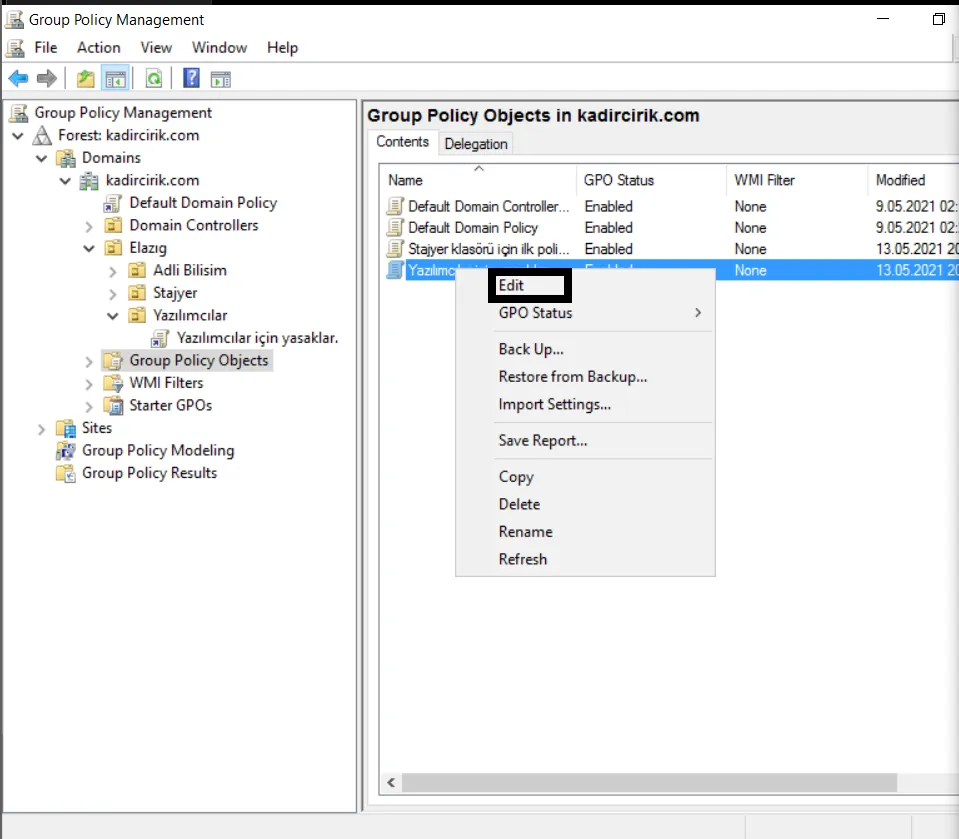
- Now we right-click the Group Policy Object (GPO) we created and select “edit”.
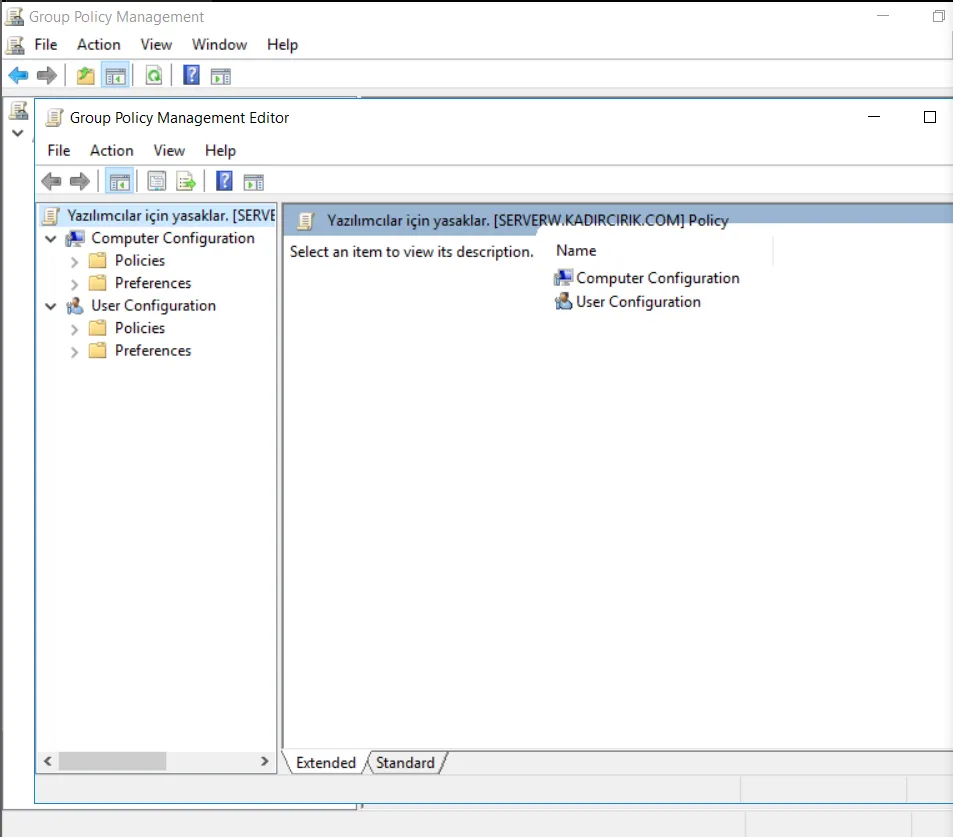
- We’re presented with a window like this. There are 2 sections here. These are:
- Computer Configuration: If we’re going to assign the policy, i.e. the restriction, to computers, we carry out our operations from this section. For example, if we want to assign restrictions to a computer or computers under a folder, we use this section.
- User Configuration: If we’re going to assign the policy, i.e. the restriction, to users, we carry out our operations from this section. For example, if we have a user under a folder and we want to restrict that user’s access to a file, folder, etc. across all computers, we use this section.
The difference between these two options is that if we assign a restriction to a computer, every user who logs on to that computer is affected by that restriction. If we assign a restriction to a user, that user is affected by the restriction wherever they log on, since the restriction is attached to them directly.
- Here, I’ll assign my restriction to users. For this, I go into the User Configuration folder. As you can see, there are many Organizational Units under this folder where we can assign restrictions.
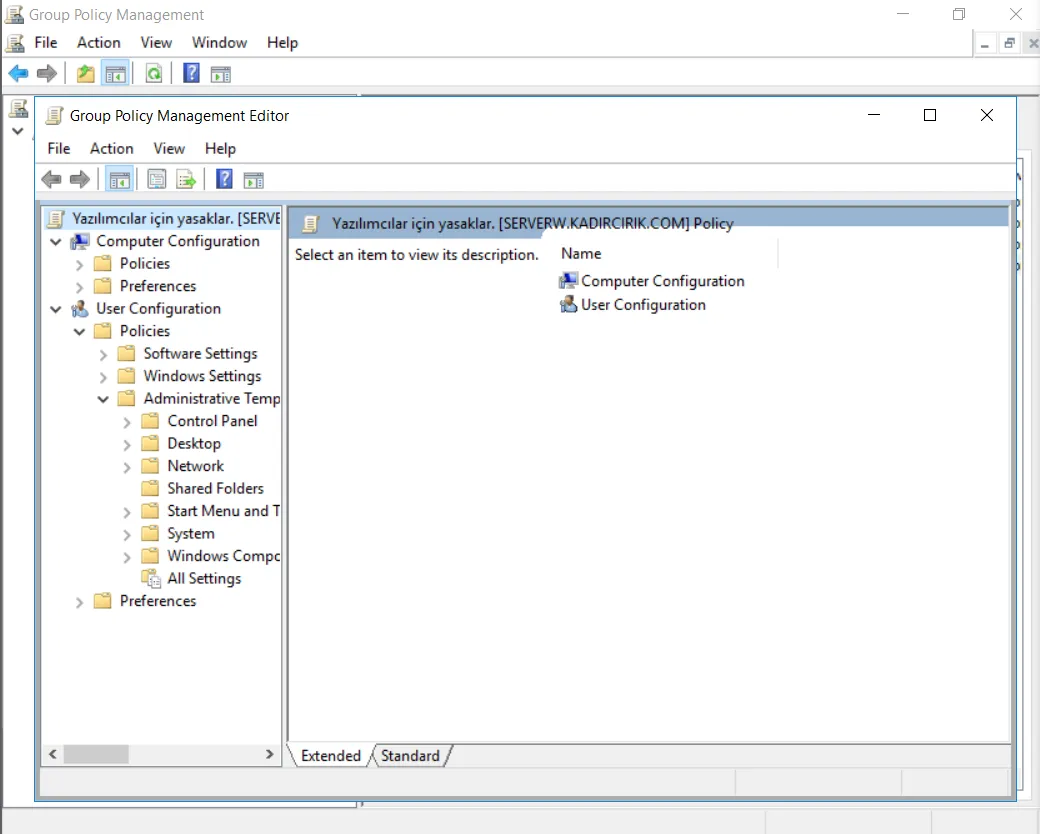
- And under each of these folders there are hundreds of default restrictions. Honestly, I don’t think anyone can know all of these restrictions by heart. You can search Google to learn what each of these restrictions means and what it can be used for.
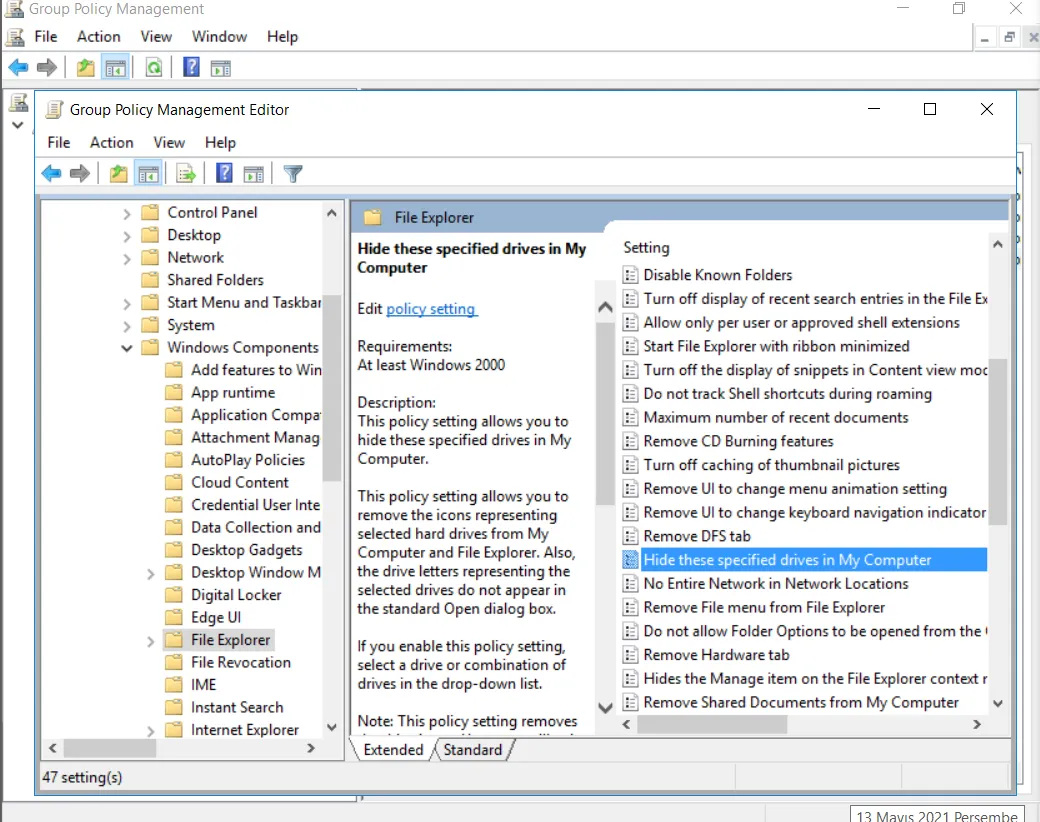
Here, I’m going to hide Local Disk C. To do this, we click on the Hide these specified drives in My computer option, found under “User Configuration>Administrative Templates>Windows Components>File Explorer”. You can learn more about what this restriction does from the description panel on the left.
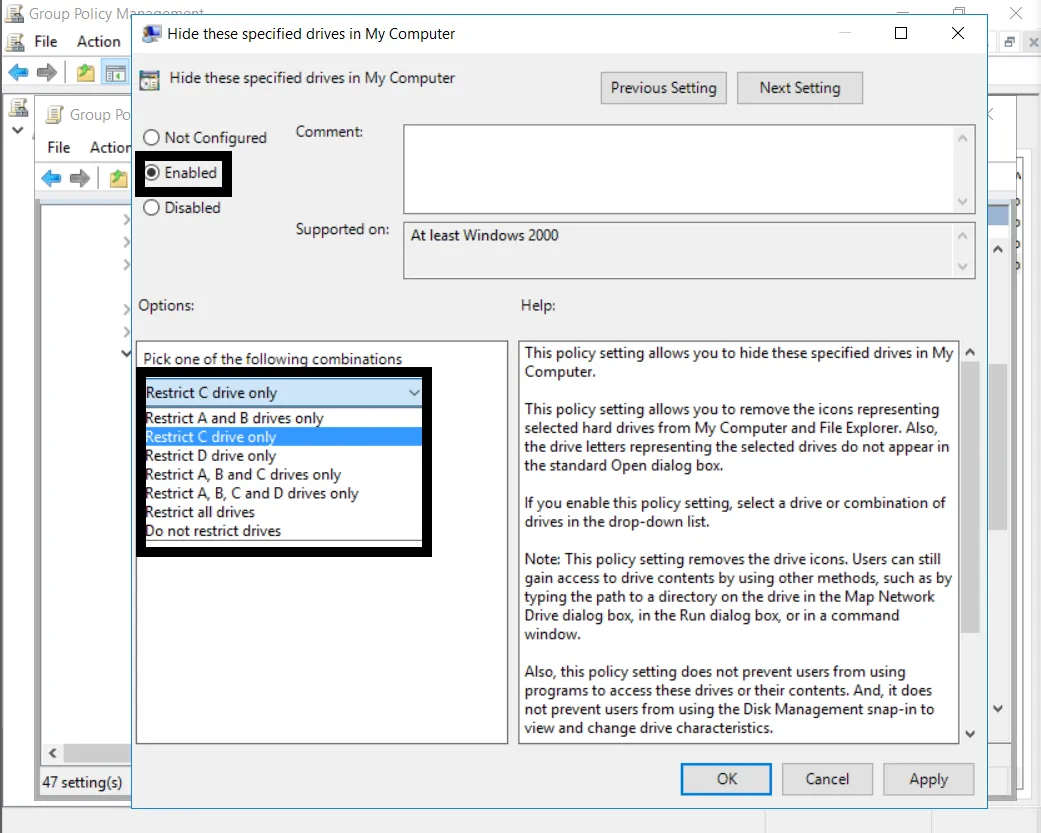
- In this section, we set the option in the box to “Enabled”.
- In the other box, it asks us to specify which disk or disks to hide. You can change the options here however you like. I’m only going to hide my C drive. I select it, click “Apply” and exit.
If you assigned the Policy you created to a user, the user needs to log off and log back on for that Policy to become active.
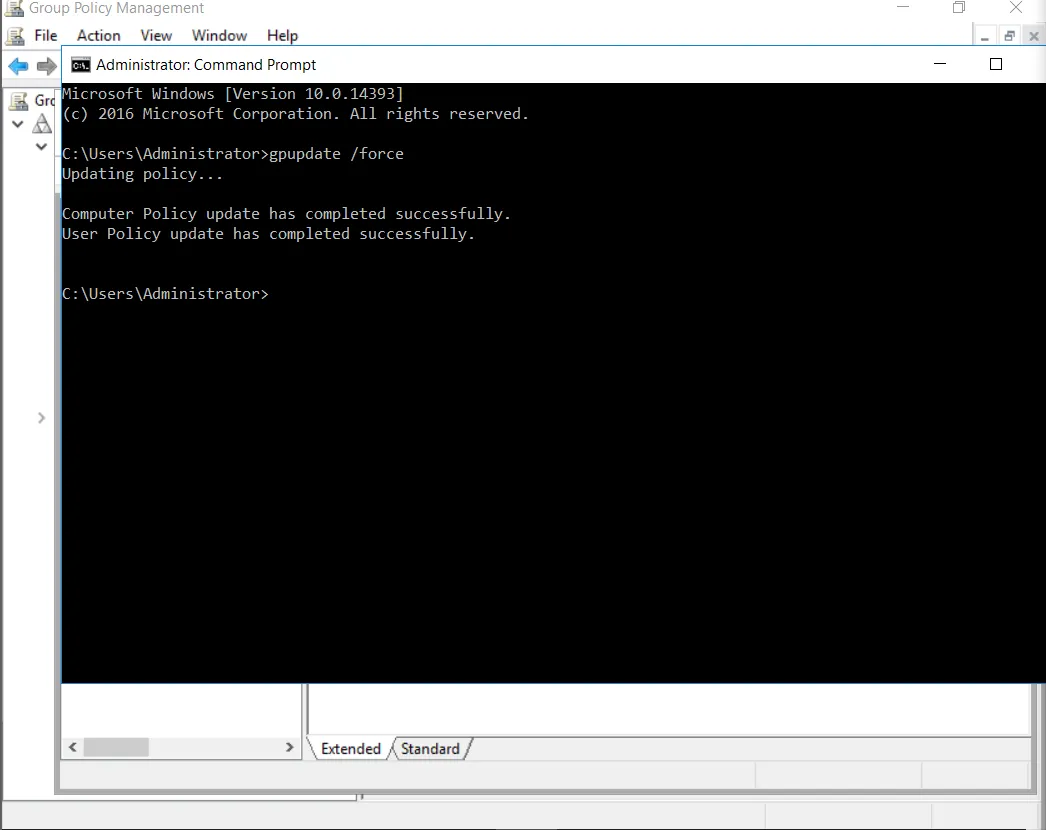
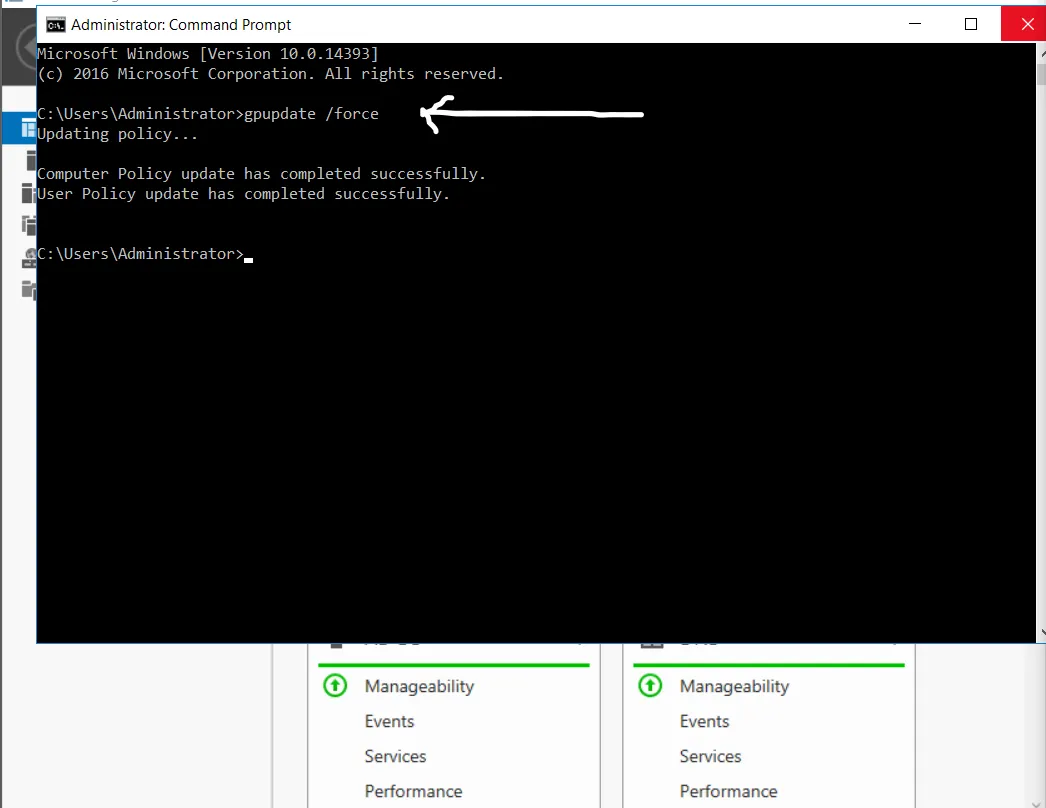
- In some cases, an applied Group Policy can take a bit to kick in. To prevent this delay, it’s useful to run the following command.
- gpupdate /force — with this command, we force the system to apply the policy immediately, essentially telling it not to introduce any delay.
Creating a Network Drive
Up to this point, with the restriction we assigned to Local Disk C, users can no longer see the C drive. Now let’s also create a network drive so users can access the files that concern them.
- For this, we go back to the GPO we created. We select “Right click>edit”.
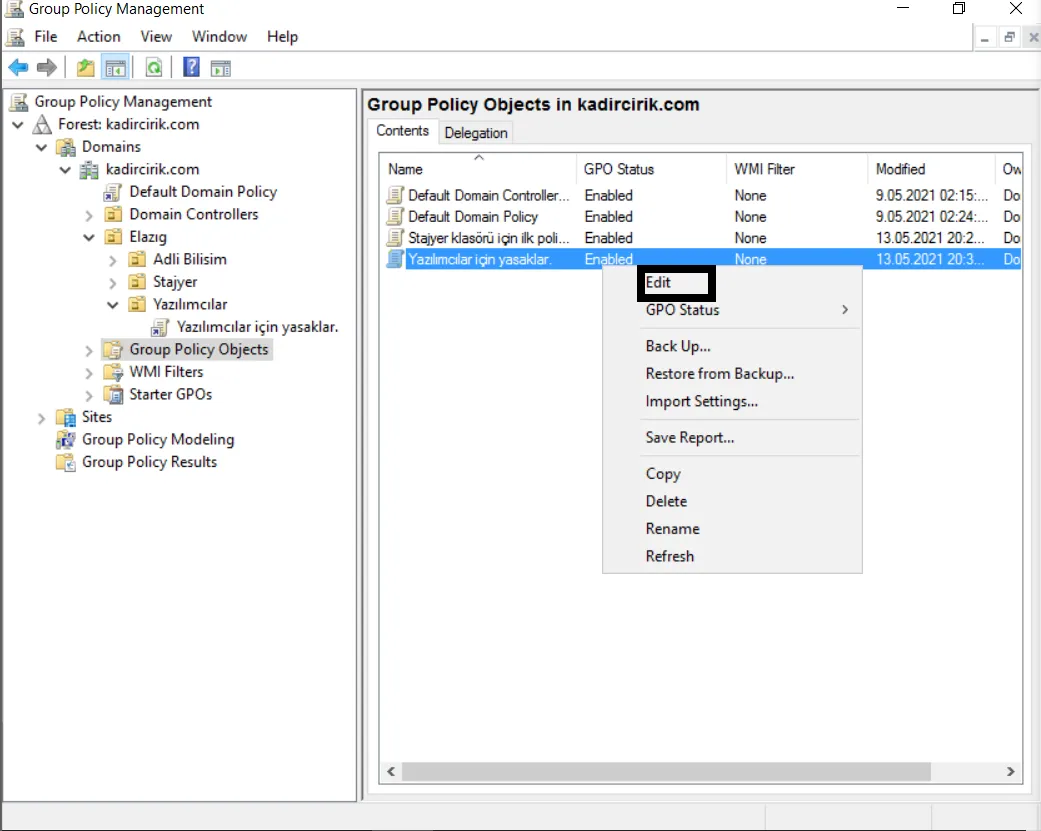
- To add this disk drive, we follow the “Preferences>Drive Maps” path.
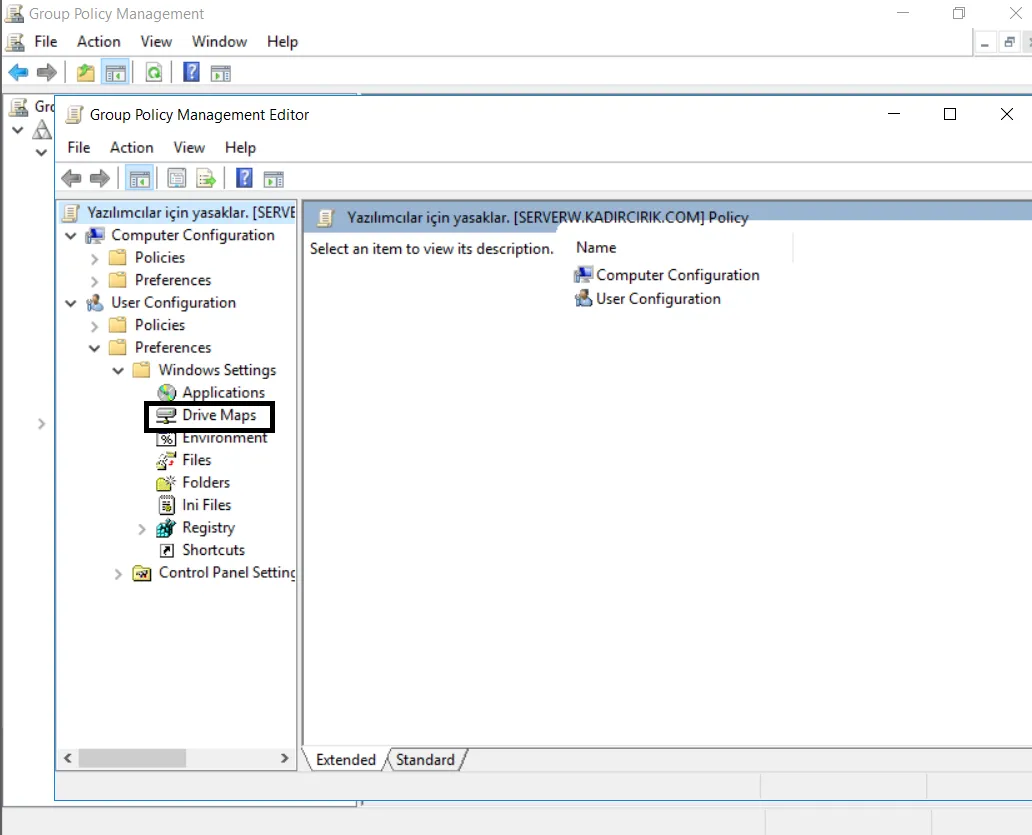
- On the screen that appears, we select “right click>new”.
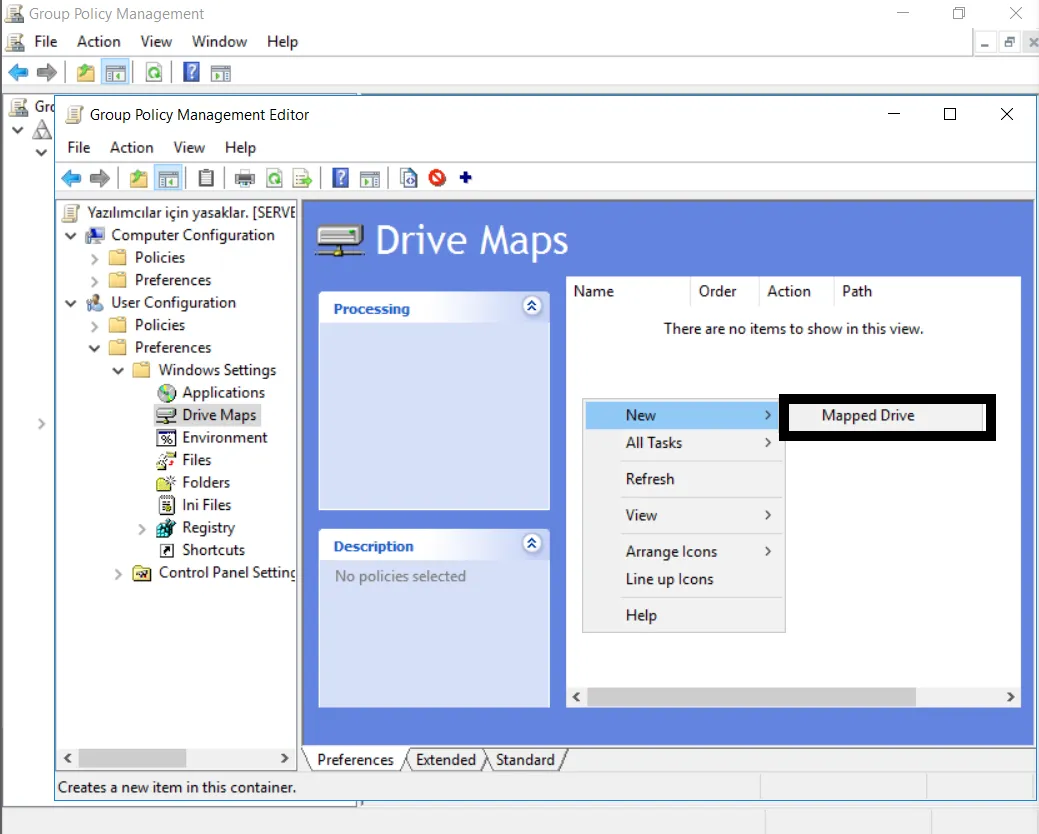
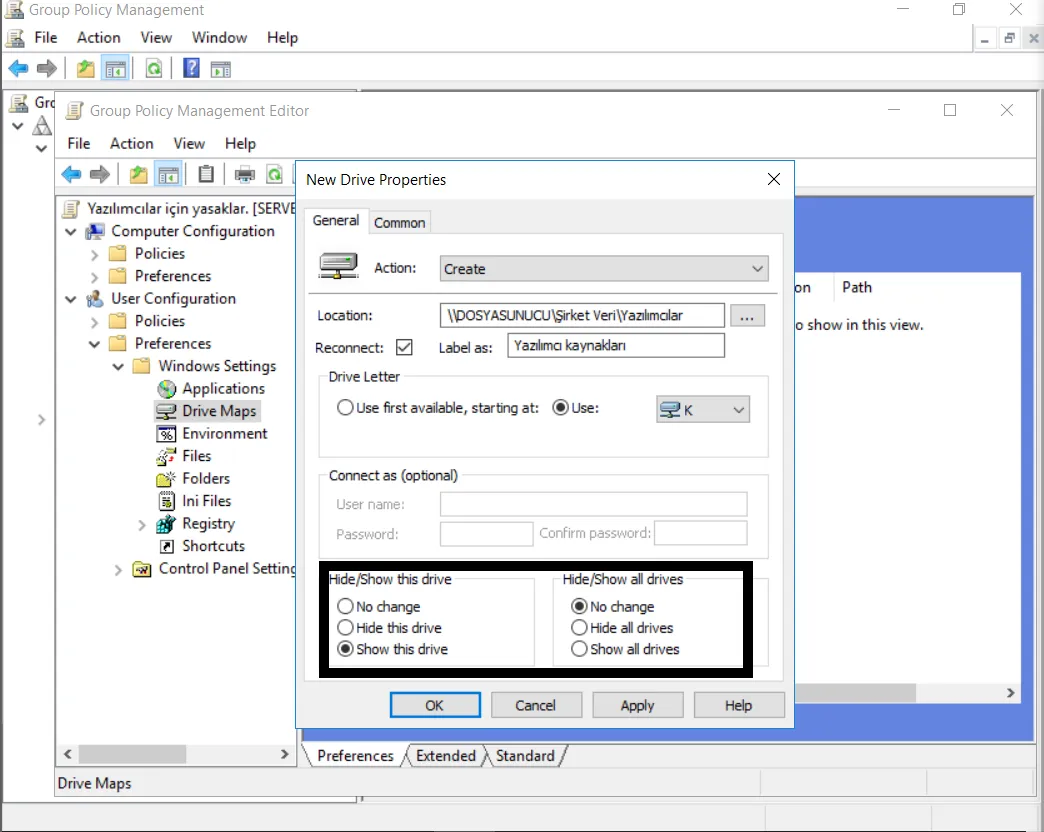
- For the Action field here, we select the “Create” option.
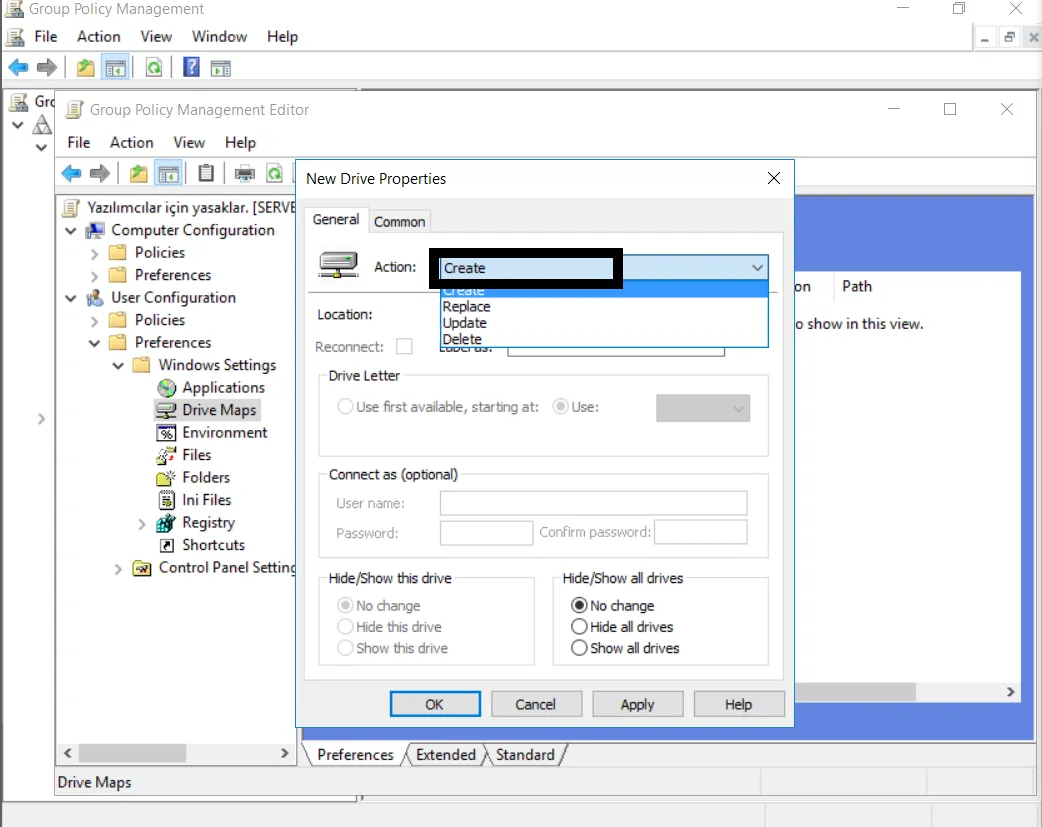
- The Location field here is where we specify the path so that a shared network resource is mapped to the user with a drive letter. I copy the network path of the folder I previously shared on my File Server and paste it here.
- You can check the “Reconnect” option if you want the connection to this resource to be re-established every time the user logs on.
- In the Label as field, we give the connection we’re creating a name.
- Right below that, we specify the drive letter we want.
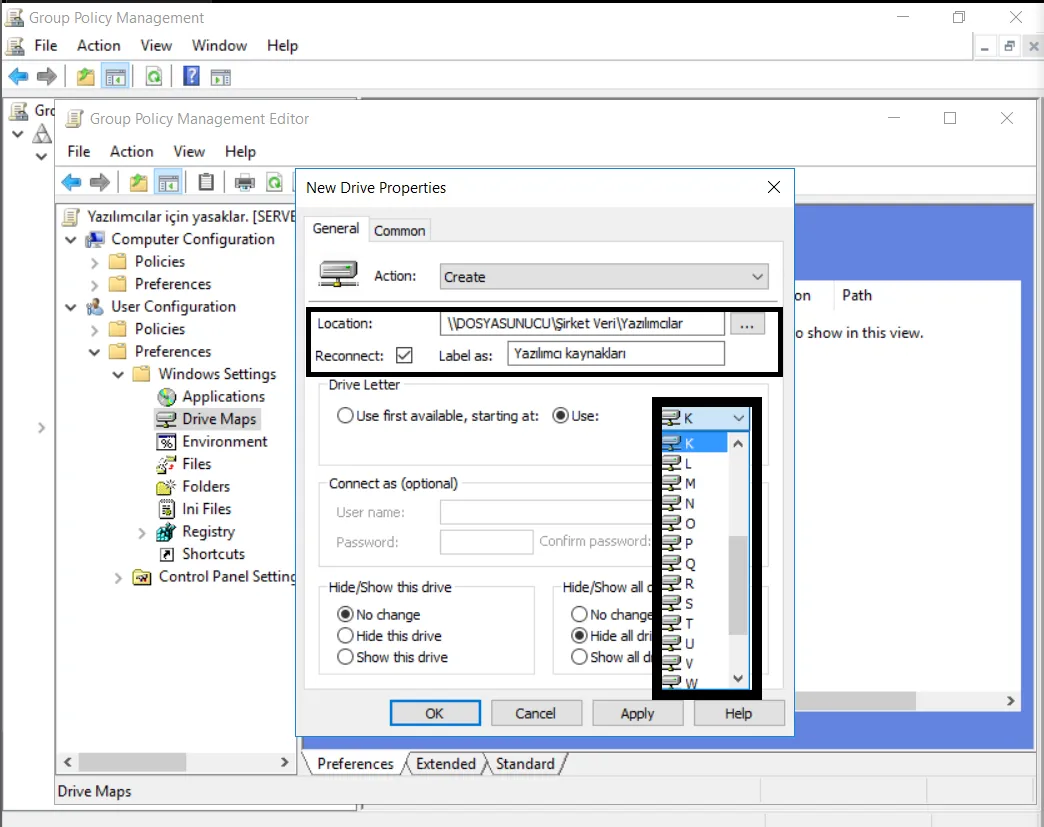
- This section here will be important for us.
- Hide/Show this drive: This option asks whether we want to show this drive — here we set the visibility for the drive we’re creating. So we set this to “Show this drive”.
- Hide/Show all drive: This asks us to configure the visibility setting for all drives. We leave this as “No change”.
After making our selections, we click Apply and exit.
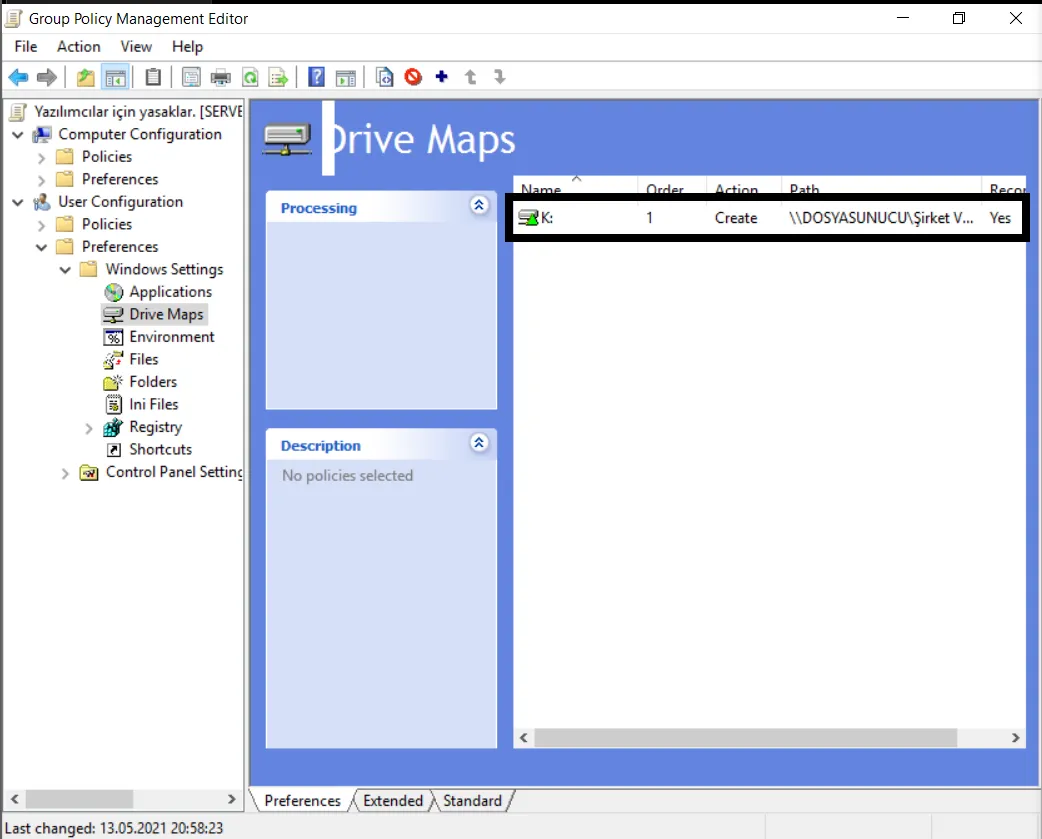
- As you can see, our drive has been created.
- Here, once again, we use the gpupdate /force command to apply our changes immediately. You can always do this.
This is how we made the changes and restrictions we wanted.
Thanks for reading this far :)