WAZUH - Host-Based Intrusion Detection System (HIDS)
In my new article I've covered Wazuh, a host-based intrusion detection system. I hope you find it useful. :) What Is Wazuh? Wazuh is an open-source Host Detection…

Hello everyone, in my new article I’ve covered Wazuh, a host-based intrusion detection system. I hope you find it useful. :)
What Is Wazuh?
Wazuh is an open-source Host Detection System (HIDS).
Wazuh is a free, open-source, and enterprise-ready security monitoring solution for threat detection, integrity monitoring, incident response, and compliance. Wazuh is used to collect, aggregate, index, and analyze security data, and it helps organizations detect intrusions, threats, and behavioral anomalies.
Wazuh has features such as Windows registry monitoring, rootkit detection, file integrity checking, and real-time alerting and response.
Wazuh Deployment Types
There are two different deployment options for Wazuh:
- All-in-one deployment: The Open Distro for Wazuh and Elasticsearch is installed on the same host.
- Distributed deployment: Each component is installed on a separate host, as a single-node or multi-node cluster. This deployment type provides a high level of availability and scalability for the product and is suitable for large working environments.
Installing Wazuh
Wazuh includes the following components;
- Wazuh Server
- Elastic Stack (ELK)
- Wazuh Agent
Now let’s take a look at how to install and configure it.
For an all-in-one deployment, we’ll install Wazuh and Open Distro for the Elasticsearch components. I’ll walk through the installation step by step here.
I’ll be doing this installation on Ubuntu.
1) Adding the Wazuh Repository
- First, we’ll install the packages required for the installation.
apt install curl apt-transport-https unzip wget libcap2-bin software-properties-common lsb-release gnupg- Installing the GPG key
curl -s https://packages.wazuh.com/key/GPG-KEY-WAZUH | apt-key add -- Adding the repository
echo "deb https://packages.wazuh.com/4.x/apt/ stable main" | tee -a /etc/apt/sources.list.d/wazuh.list- Updating package information
apt-get update2) Installing the Wazuh Manager
- Installing the Wazuh manager package
apt-get install wazuh-manager- Enabling and starting the Wazuh manager service.
systemctl daemon-reload
systemctl enable wazuh-manager
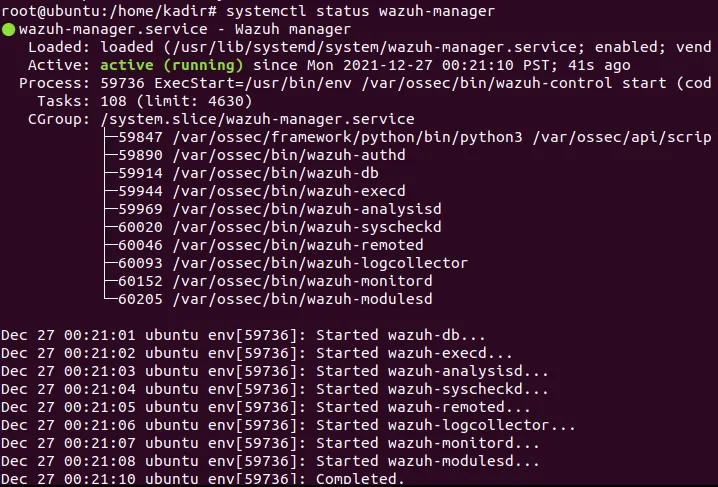
systemctl start wazuh-manager- You can run the following command to check the status of the Wazuh manager.
systemctl status wazuh-managerAnd the output of the command should look like this.
3) Installing Elasticsearch
- Installing Elasticsearch and enabling the Open Distro repository for Elasticsearch
apt install elasticsearch-oss opendistroforelasticsearch4) Configuring Elasticsearch
- We run the following command to download the configuration file.
curl -so /etc/elasticsearch/elasticsearch.yml https://packages.wazuh.com/resources/4.2/open-distro/elasticsearch/7.x/elasticsearch_all_in_one.yml5) Setting Up Elasticsearch Users and Roles
- To use Kibana properly, we need to add users and roles. For this, we need to run the following commands in order.
curl -so /usr/share/elasticsearch/plugins/opendistro_security/securityconfig/roles.yml https://packages.wazuh.com/resources/4.2/open-distro/elasticsearch/roles/roles.ymlcurl -so /usr/share/elasticsearch/plugins/opendistro_security/securityconfig/roles_mapping.yml https://packages.wazuh.com/resources/4.2/open-distro/elasticsearch/roles/roles_mapping.ymlcurl -so /usr/share/elasticsearch/plugins/opendistro_security/securityconfig/internal_users.yml https://packages.wazuh.com/resources/4.2/open-distro/elasticsearch/roles/internal_users.yml6) Generating Certificates
- Run the following command to remove the demo certificates.
## rm /etc/elasticsearch/esnode-key.pem /etc/elasticsearch/esnode.pem /etc/elasticsearch/kirk-key.pem /etc/elasticsearch/kirk.pem /etc/elasticsearch/root-ca.pem -f- We need to run the following commands in order to generate and deploy the certificates.
curl -so ~/wazuh-cert-tool.sh https://packages.wazuh.com/resources/4.2/open-distro/tools/certificate-utility/wazuh-cert-tool.shcurl -so ~/instances.yml https://packages.wazuh.com/resources/4.2/open-distro/tools/certificate-utility/instances_aio.yml- We run the following command to generate the certificates.
bash ~/wazuh-cert-tool.sh- We can run the following commands in order to move the Elasticsearch certificates to their proper locations.
mkdir /etc/elasticsearch/certs/mv ~/certs/elasticsearch* /etc/elasticsearch/certs/mv ~/certs/admin* /etc/elasticsearch/certs/cp ~/certs/root-ca* /etc/elasticsearch/certs/- We run the following commands in order to enable and start the Elasticsearch service.
systemctl daemon-reloadsystemctl enable elasticsearchsystemctl start elasticsearch- We use the following command to run the Elasticsearch script that loads and applies the new certificate information.
export JAVA_HOME=/usr/share/elasticsearch/jdk/ && /usr/share/elasticsearch/plugins/opendistro_security/tools/securityadmin.sh -cd /usr/share/elasticsearch/plugins/opendistro_security/securityconfig/ -nhnv -cacert /etc/elasticsearch/certs/root-ca.pem -cert /etc/elasticsearch/certs/admin.pem -key /etc/elasticsearch/certs/admin-key.pem- We run the following command to check whether the Elasticsearch installation succeeded.
curl -XGET https://localhost:9200 -u admin:admin -k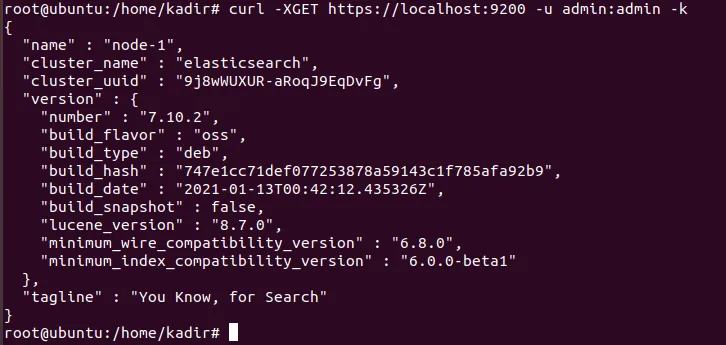
To view it via localhost, we paste the following command into our browser and get a result like the one shown in the image.
https://localhost:9200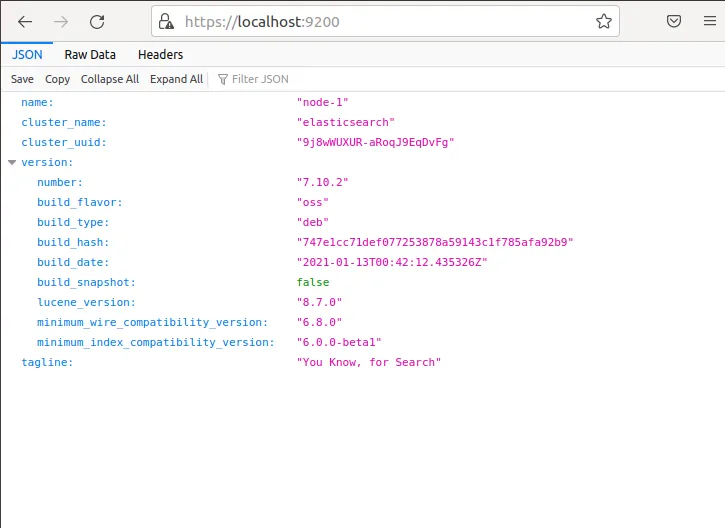
7) Installing Filebeat
Filebeat is the tool on the Wazuh server that securely forwards alerts and logged events to Elasticsearch.
- The Filebeat package is installed as follows.
apt-get install filebeat- We use the following command to download the preconfigured Filebeat configuration file used to forward Wazuh alerts to Elasticsearch.
curl -so /etc/filebeat/filebeat.yml https://packages.wazuh.com/resources/4.2/open-distro/filebeat/7.x/filebeat_all_in_one.yml- We download the alert template for Elasticsearch.
curl -so /etc/filebeat/wazuh-template.json https://raw.githubusercontent.com/wazuh/wazuh/4.2/extensions/elasticsearch/7.x/wazuh-template.jsonchmod go+r /etc/filebeat/wazuh-template.json- We download the Wazuh module for Filebeat.
curl -s https://packages.wazuh.com/4.x/filebeat/wazuh-filebeat-0.1.tar.gz | tar -xvz -C /usr/share/filebeat/module- We copy the Elasticsearch certificates.
## mkdir /etc/filebeat/certs
## cp ~/certs/root-ca.pem /etc/filebeat/certs/
## mv ~/certs/filebeat* /etc/filebeat/certs/- We enable and start the Filebeat service with the following commands.
## systemctl daemon-reload
## systemctl enable filebeat
## systemctl start filebeat
8) Installing Kibana
Kibana is a flexible and intuitive web interface for visualizing events stored in Elasticsearch and providing a UI.
- Let’s install the Kibana package.
apt-get install opendistroforelasticsearch-kibana- Let’s download the Kibana configuration file.
curl -so /etc/kibana/kibana.yml https://packages.wazuh.com/resources/4.2/open-distro/kibana/7.x/kibana_all_in_one.yml- We create the following directory by running the following commands in order.
## mkdir /usr/share/kibana/data
## chown -R kibana:kibana /usr/share/kibana/data- We install the Wazuh Kibana plugin. The plugin should be installed from the Kibana home directory as follows
## cd /usr/share/kibana
## sudo -u kibana /usr/share/kibana/bin/kibana-plugin install https://packages.wazuh.com/4.x/ui/kibana/wazuh_kibana-4.2.5_7.10.2-1.zip- We copy the Elasticsearch certificates here and run the following commands.
## mkdir /etc/kibana/certs
## cp ~/certs/root-ca.pem /etc/kibana/certs/
## mv ~/certs/kibana* /etc/kibana/certs/
## chown kibana:kibana /etc/kibana/certs/*- We bind the Kibana socket to the privileged port 443.
setcap 'cap_net_bind_service=+ep' /usr/share/kibana/node/bin/node- We enable and start the Kibana service.
## systemctl daemon-reload
## systemctl enable kibana
## systemctl start kibana- We check the status of Kibana with the following command.
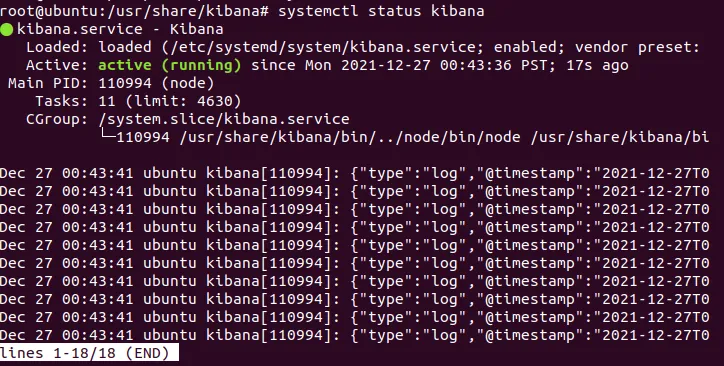
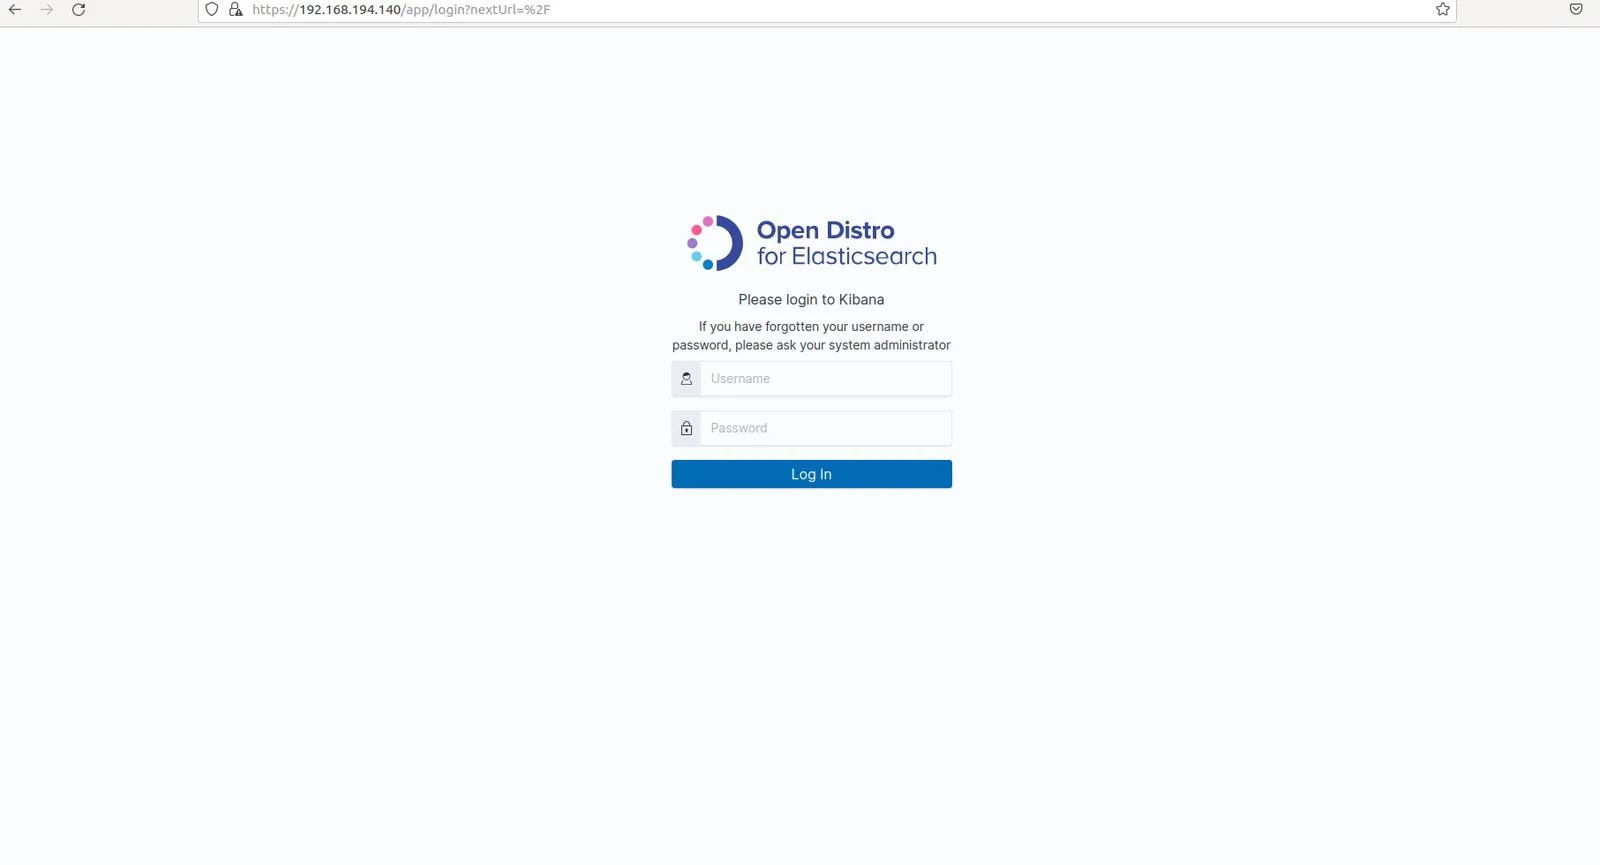
- We access the web interface as follows.
URL: https://<wazuh_server_ip>
user: admin
password: admin
I enter the IP address in place of “wazuh_server_ip”. And a login screen like the one below appears.
Thanks for reading this far. :)