Examining EXIF Data from a Digital Forensics Perspective
EXIF was designed and released in 1998 by the “Japan Electronic Industries Development Association” (JEIDA). Since its release, it has grown so important that it can…

Hello everyone. :)
EXIF was designed and released in 1998 by the “Japan Electronic Industries Development Association” (JEIDA). Since its release, it has grown so important that it can hold a huge amount of information — from where and how a photo was taken to the tags you might add to an image.
A photo taken with a digital camera is not just an image file. The set of information attached to a captured photo — shutter speed, ISO speed, aperture, white balance, camera make and model, location data, date and time, lens type, focal length, and much more — is called “exchangeable image file” format, i.e. EXIF.
A few years back, a hacker posted a photo of his girlfriend on an index site used to deface large websites. After a detailed examination of that photo, investigators used its EXIF data to pinpoint the location it was taken, which led to the hacker being caught. This shows just how significant EXIF data is for digital forensics. The more detail you can extract and the more thoroughly you examine it, the easier it becomes to reach a conclusion.
Viewing EXIF Data from Your Computer
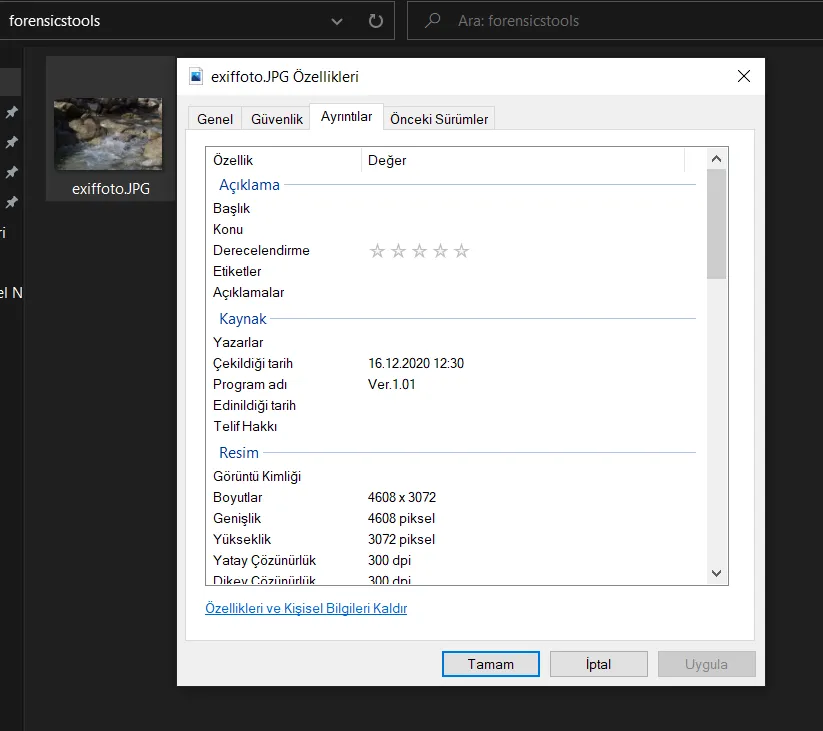
To view the EXIF data of a photo, first right-click it and select “Properties”.
Then, click the “Details” panel, which is the third tab at the top of the window, to access the photo’s EXIF data. This information is fairly detailed — it includes the photo’s resolution, where it was taken, whether the flash fired, and a number of similar details. However, it doesn’t give us anything beyond that. For deeper, forensics-grade detail, we can turn to a few dedicated programs and websites.
The EXIFTOOL Tool
Exiftool is a command-line forensic tool used to read and write metadata across various file types. It is written in Perl. It comes preinstalled with Backtrack and Kali, and versions are also available for Windows and Mac. There is also a GUI version of Exiftool for Windows.
- On Linux, it can be installed by running “apt-get install exiftool”. Usage is quite straightforward, as shown below:
- When listing EXIF data, it shows only the specified tags.
-Example: exiftool –comment foto.jpg
- The -all tag is used to display all EXIF data.
-Example: exiftool –all foto.jpg
Reading EXIF Data on Windows
- On Windows, you can download the Exiftool tool from this link and run it from the command line.
First, simply drag and drop the photo whose EXIF data you want onto the exiftool executable.
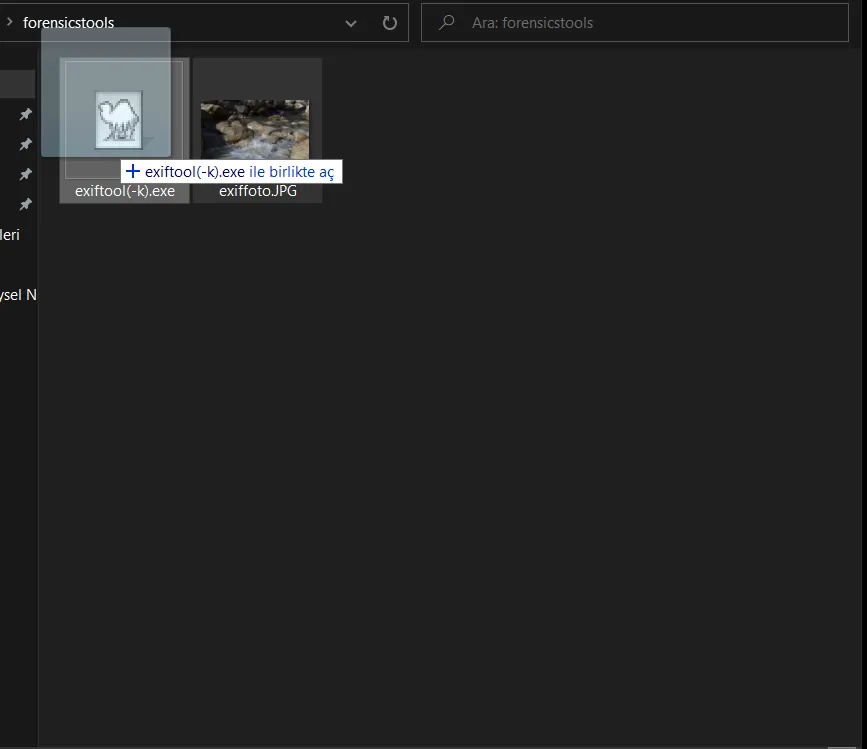
As soon as you drag and drop the photo, you get its EXIF data on the command line as shown below.
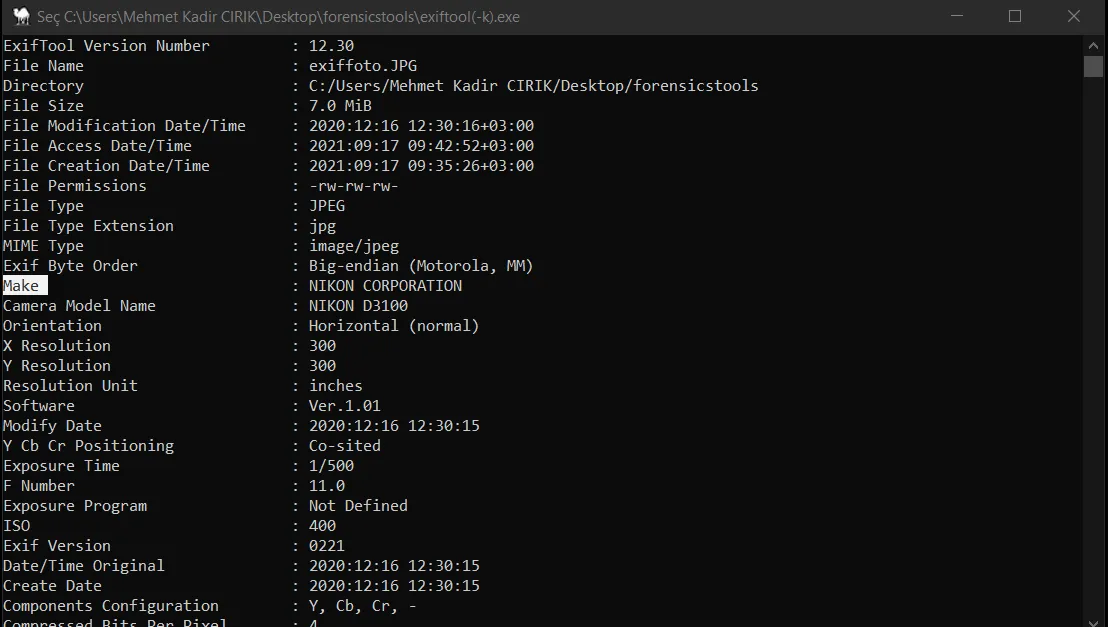
Below are some examples of the kind of data you can retrieve. For instance, in this image we can see the camera’s make and model.
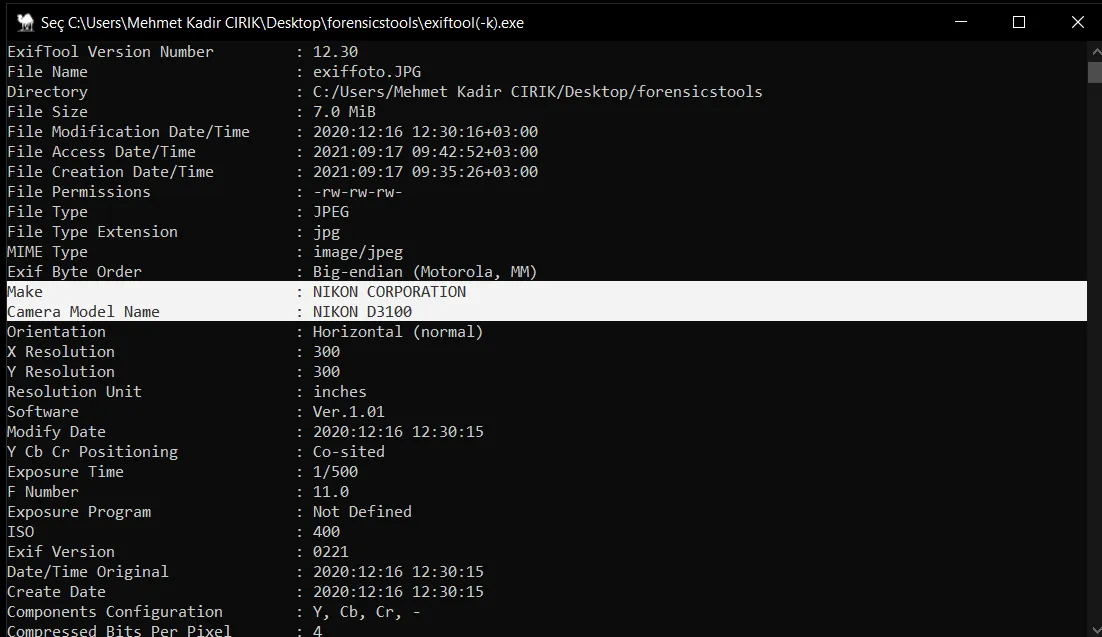
Here we can see the photo’s creation and capture dates.
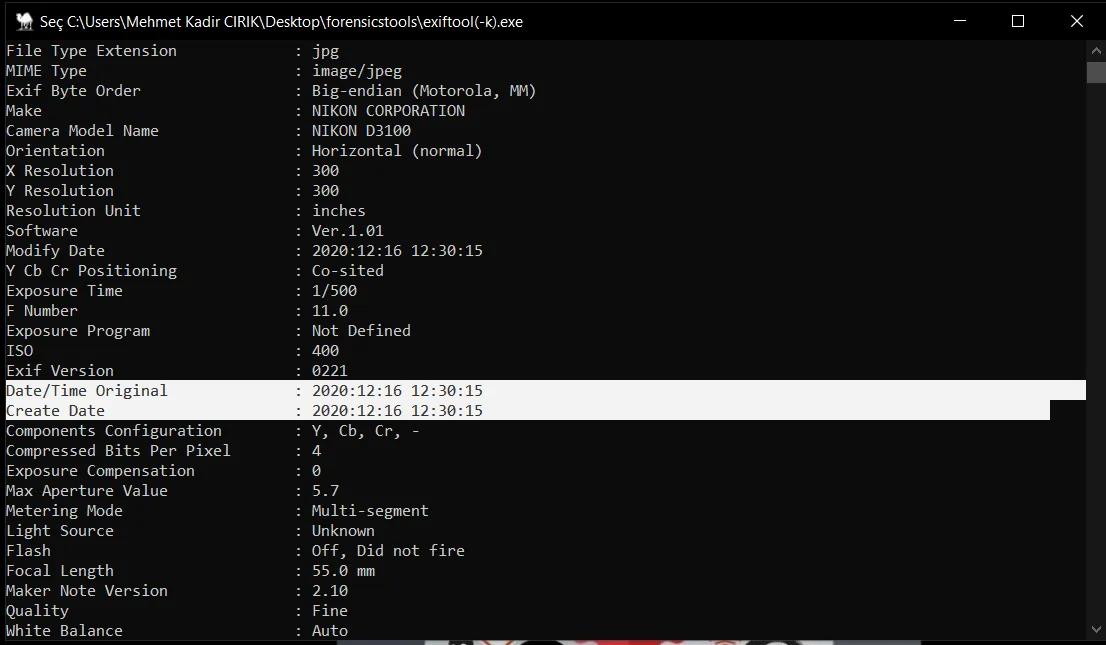
In this section, we can see the lens type and lens information.
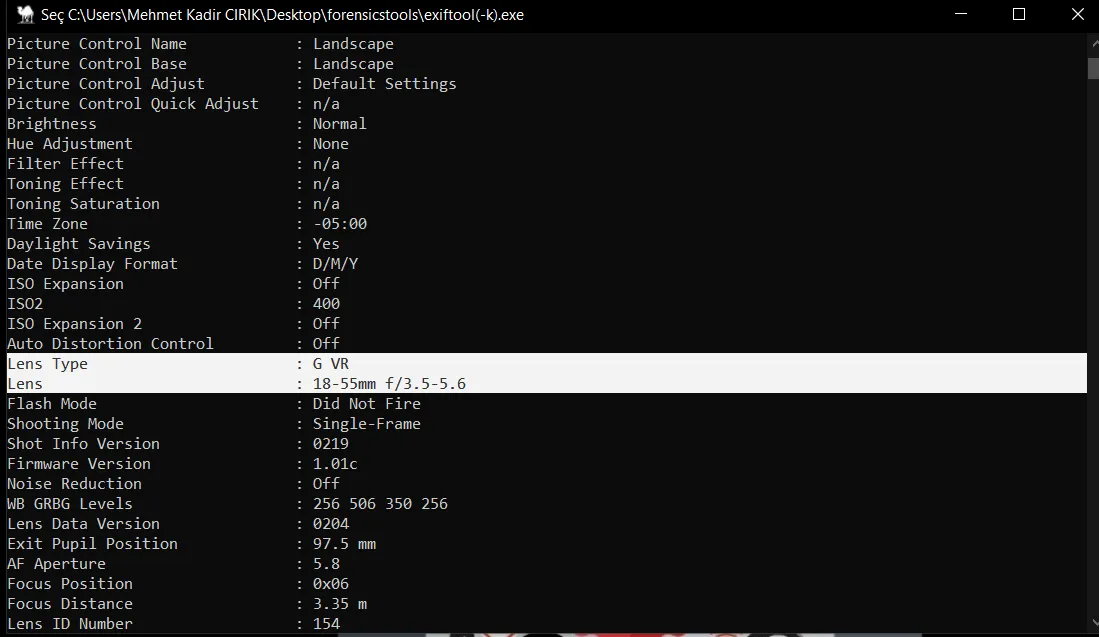
Scrolling further down reveals even more data. In this image we can see the Lens ID.
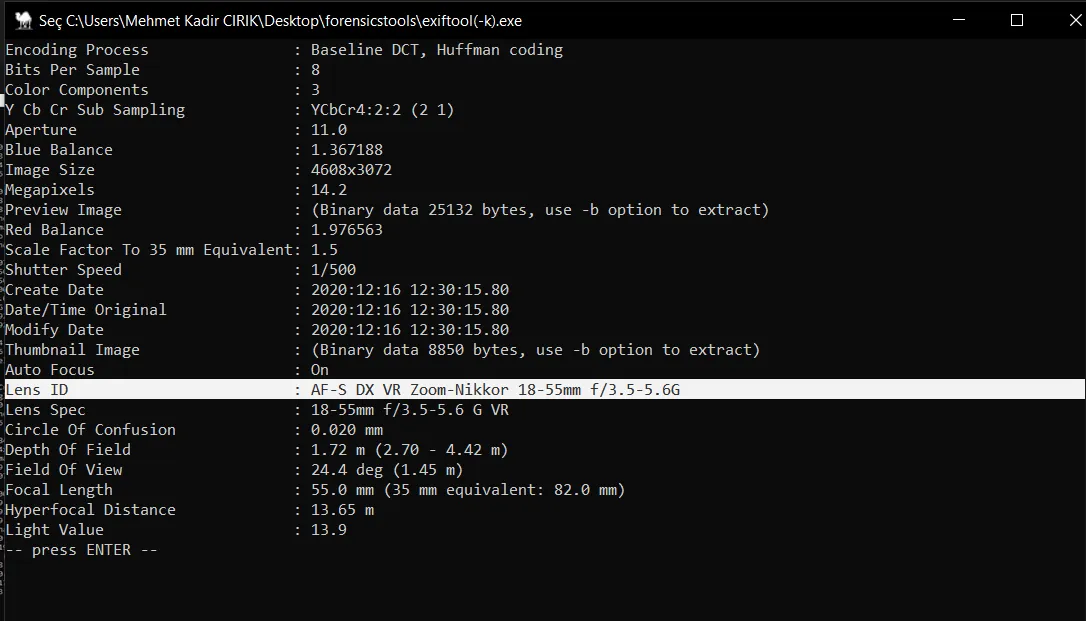
Querying EXIF Data with PIC2MAP
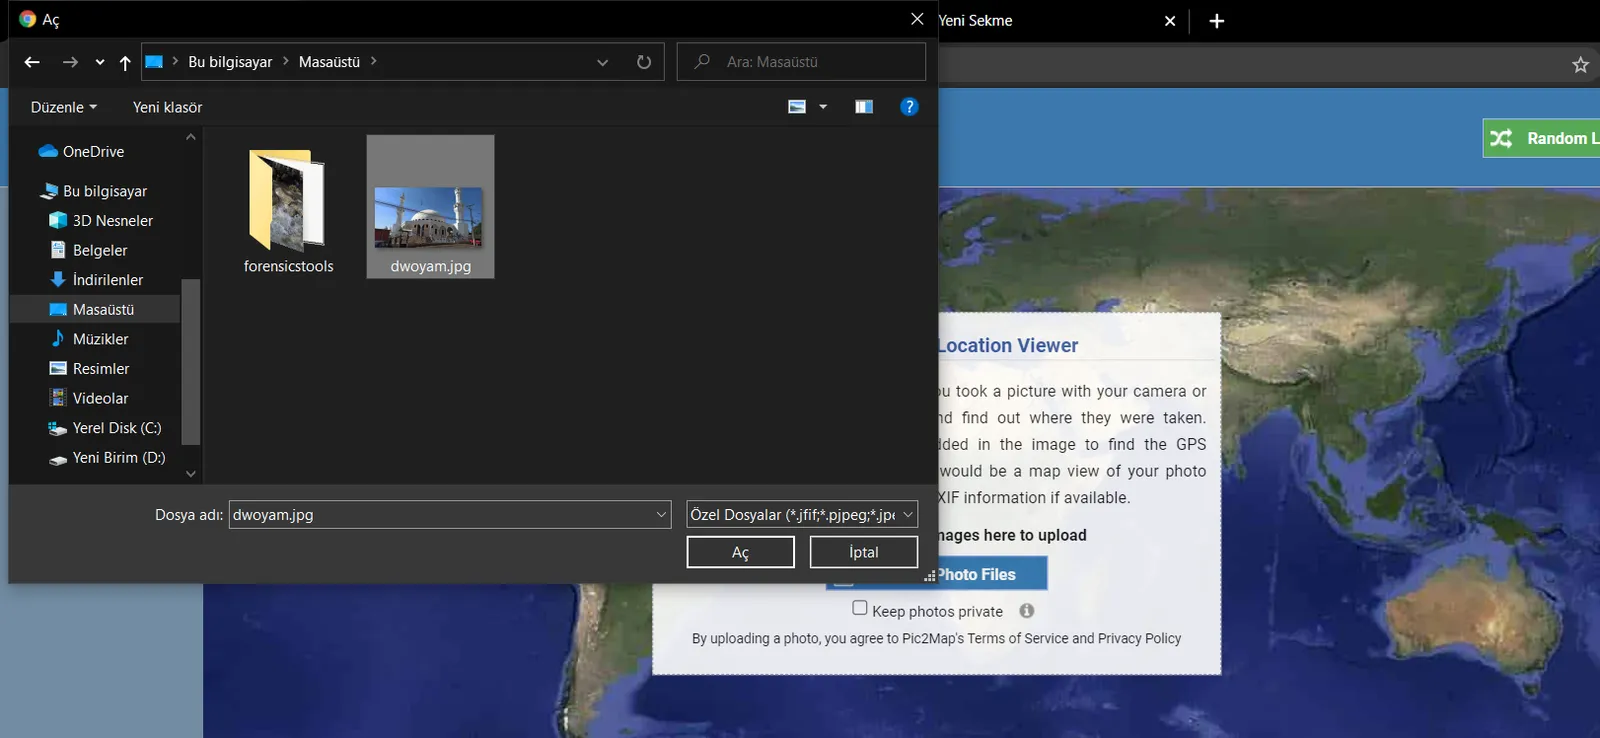
As another method, we’ll query EXIF data through the “PIC2MAP” website.
First, as shown in the image, we upload the image file we want to examine.
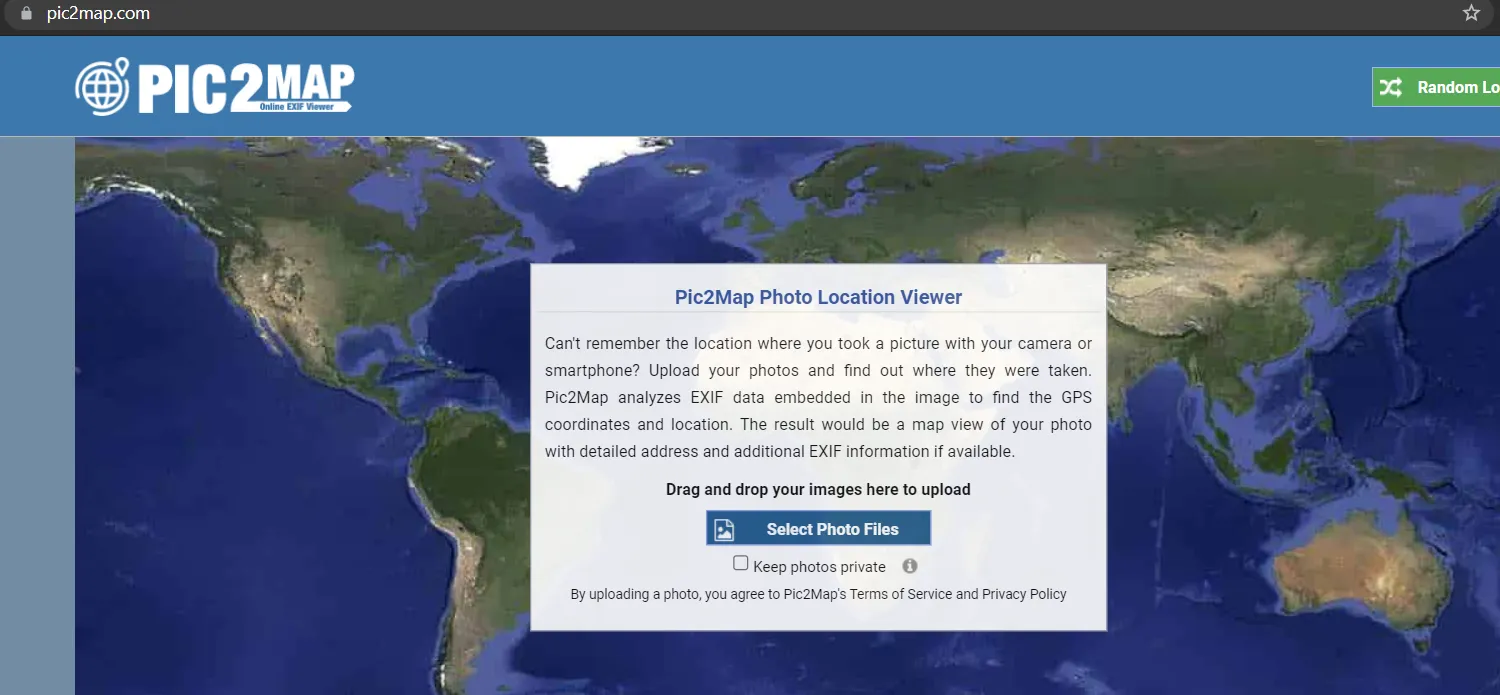
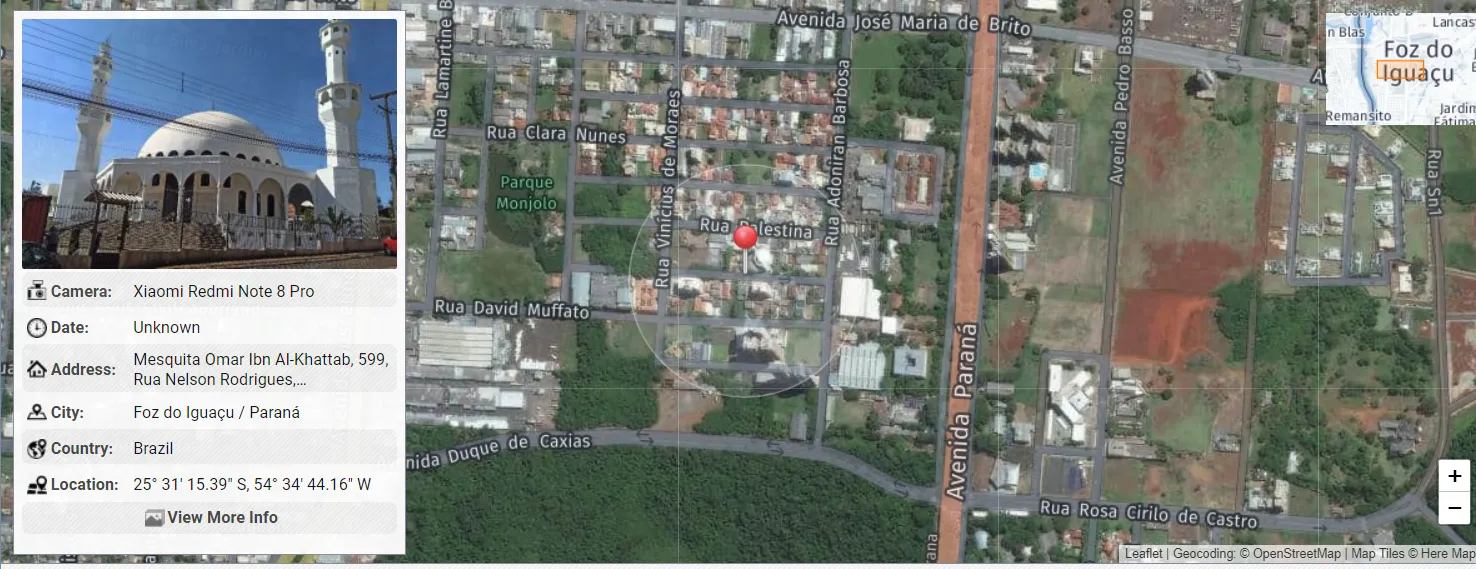
We then see the information about the selected image file, along with the location it was taken, as shown below.
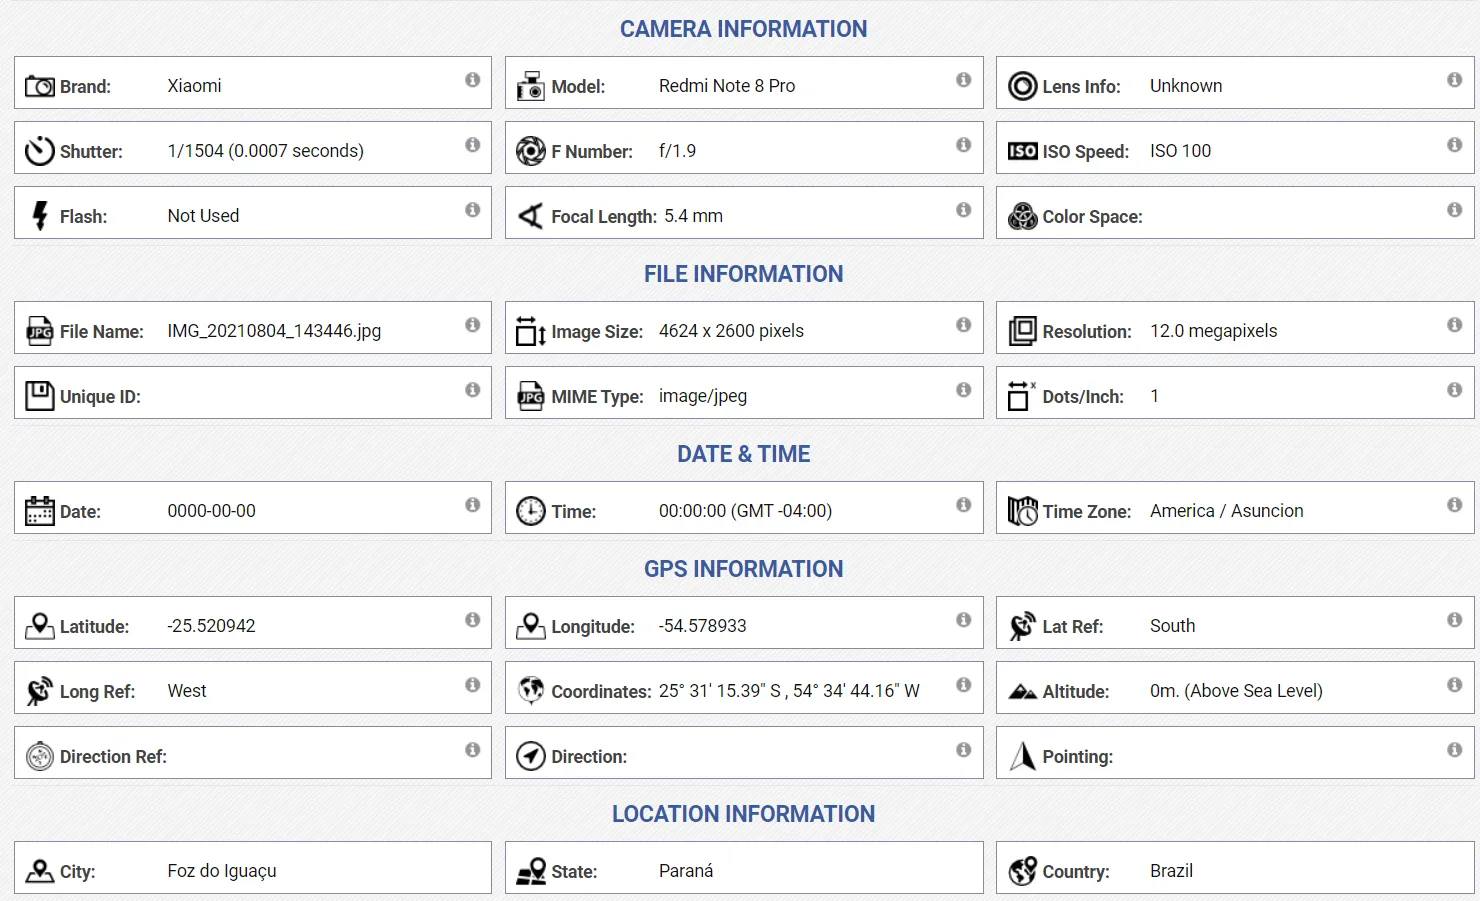
Here again we see camera information, date information, location information, and much more.
When I copy and paste the photo’s location data into Google Maps, we can see exactly where the photo was taken.
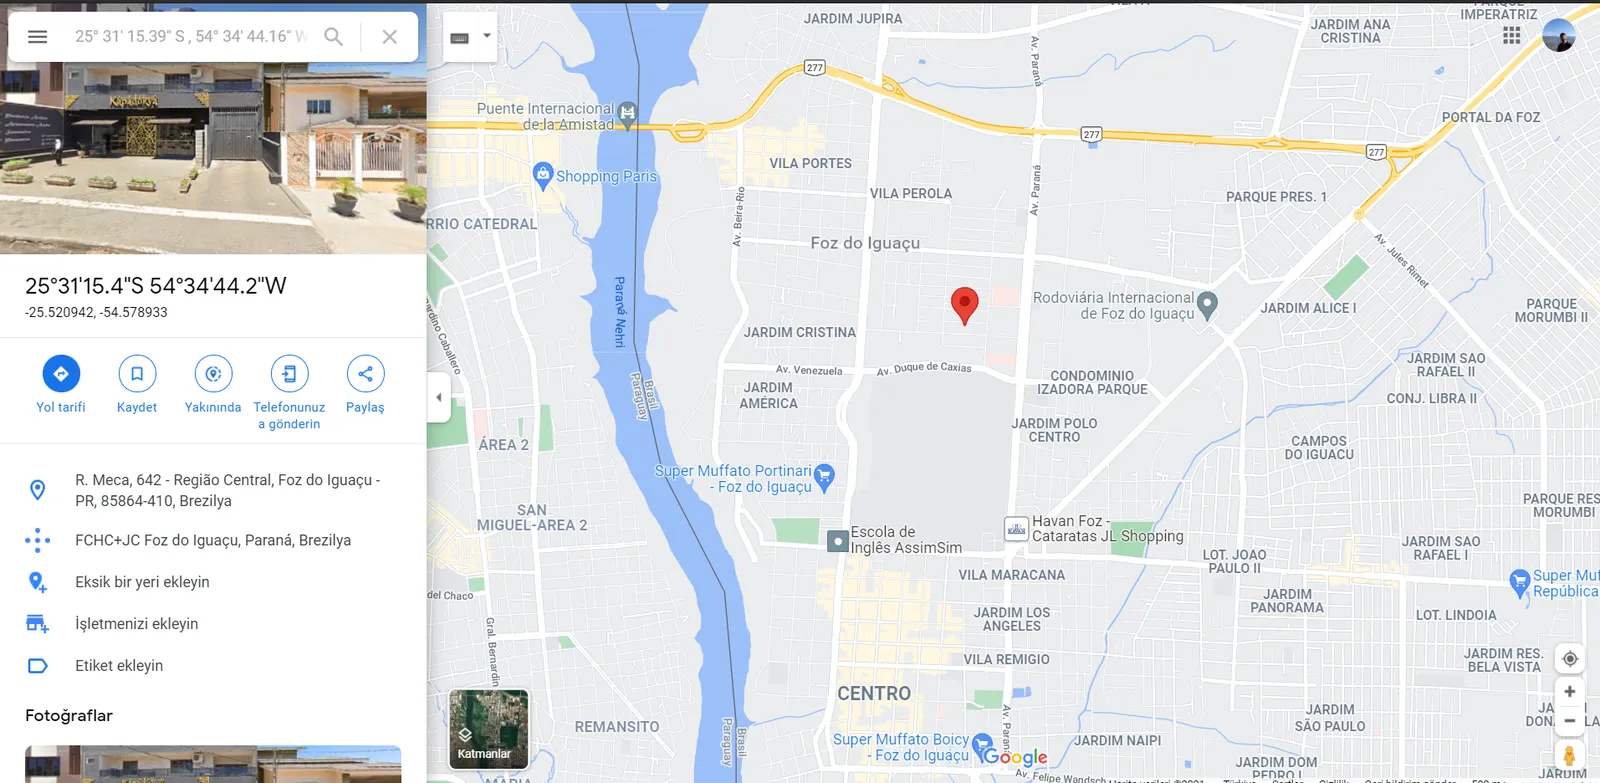
As a result, this is how we can obtain detailed information about a photo that was captured and shared, almost instantly.
Thanks for reading. :)