Adli BilişimSiber Güvenlik
Installing Ubuntu on a Virtual Machine with VirtualBox (with images)
In this article, as you can tell from the title, I'll walk you through how to install the Ubuntu operating system on our virtual machine, with images. In my previous articles…

Mehmet Kadir CIRIK
Hello everyone :)
In this article, as you can tell from the title, I’ll walk you through how to install the Ubuntu operating system on our virtual machine, with images. In my previous articles, I explained in detail what virtualization means, virtualization programs, and how to install VirtualBox. In this article, I’ll explain how to perform Ubuntu Installation using VirtualBox.
- Before starting the installation, you can find detailed information about what virtualization is in my article https://www.kadircirik.com/sanallastirma-sanal-makina-nedir-ne-ise-yarar/, which you can reach here.
Step 1 =>>>
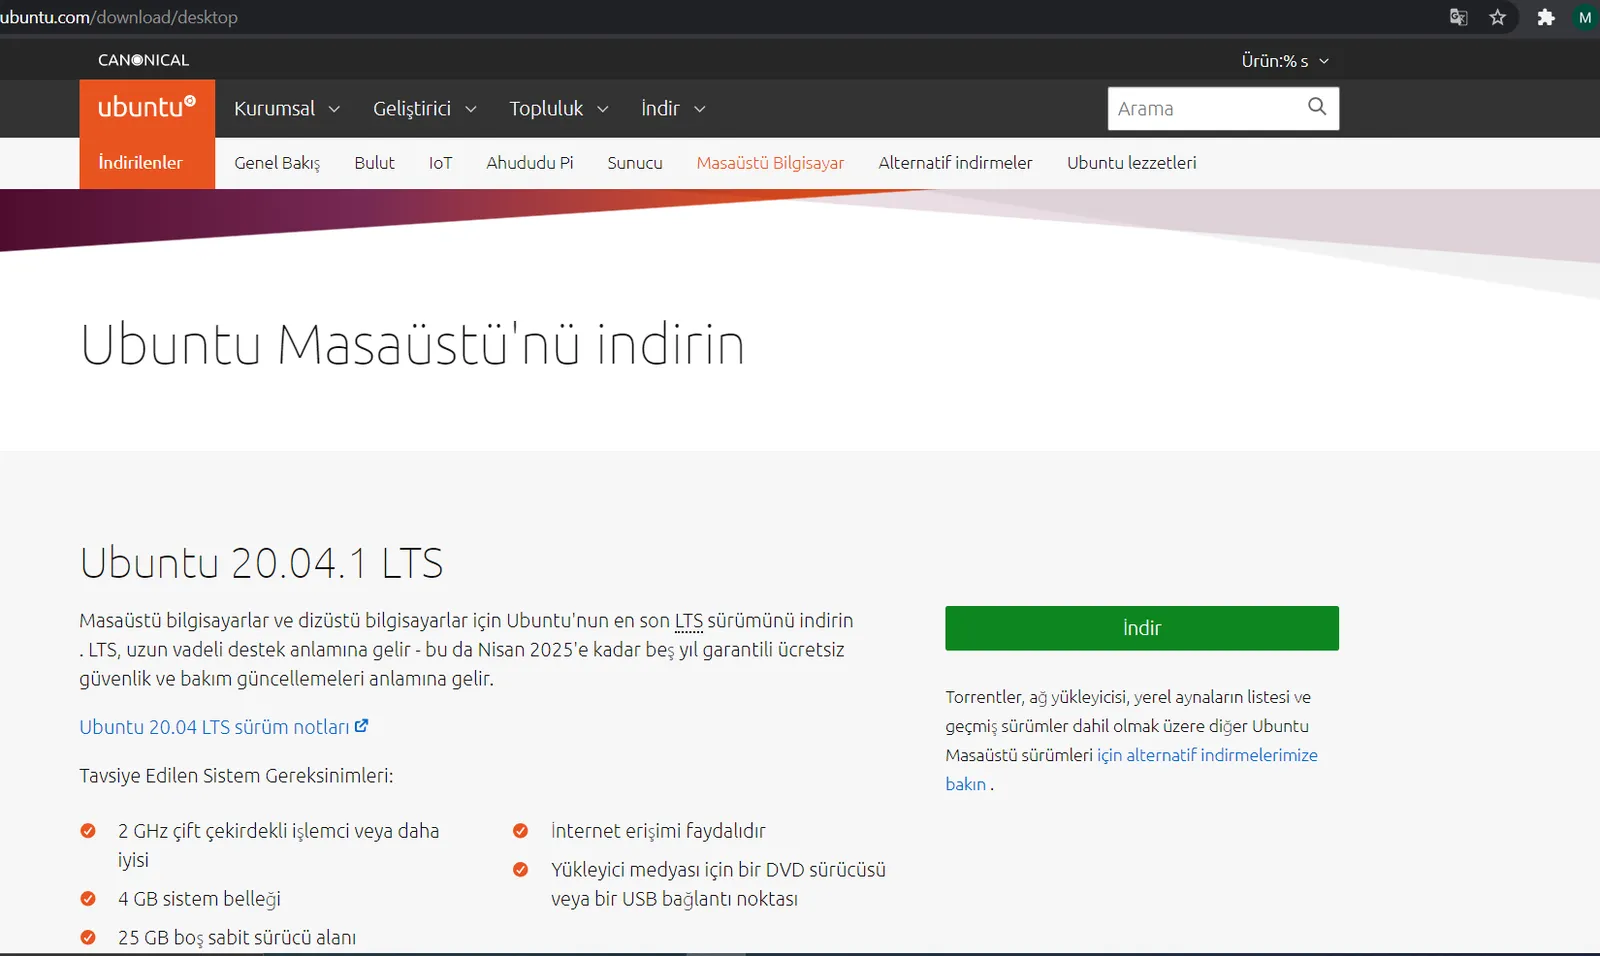
- First, we download the iso download file of the Ubuntu operating system by clicking this link.
- The current latest version is 20.04.1, and that’s the version we’re downloading.
- Our iso file is approximately 2.6 GB in size.
Step 2 =>>>
- Now, before installing Ubuntu on VirtualBox, let’s make the necessary settings in VirtualBox.
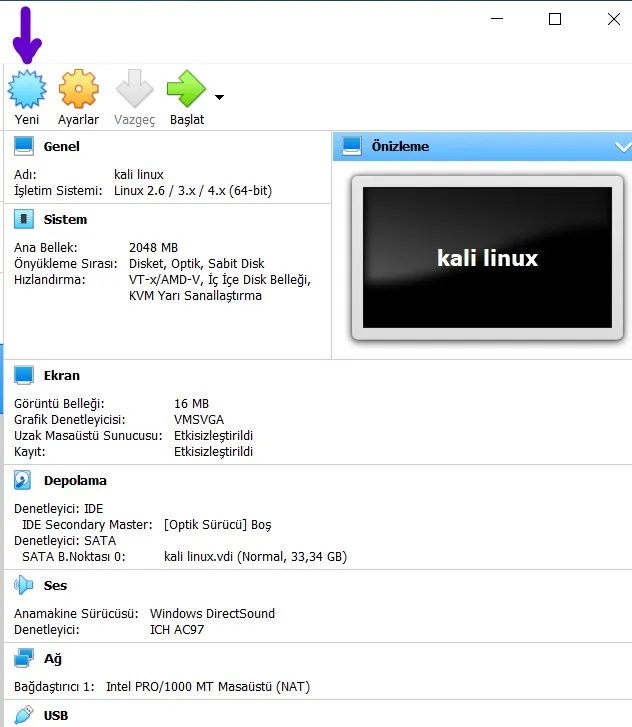
- Let’s open the VirtualBox program we installed and click the New button.
Step 3 =>>>
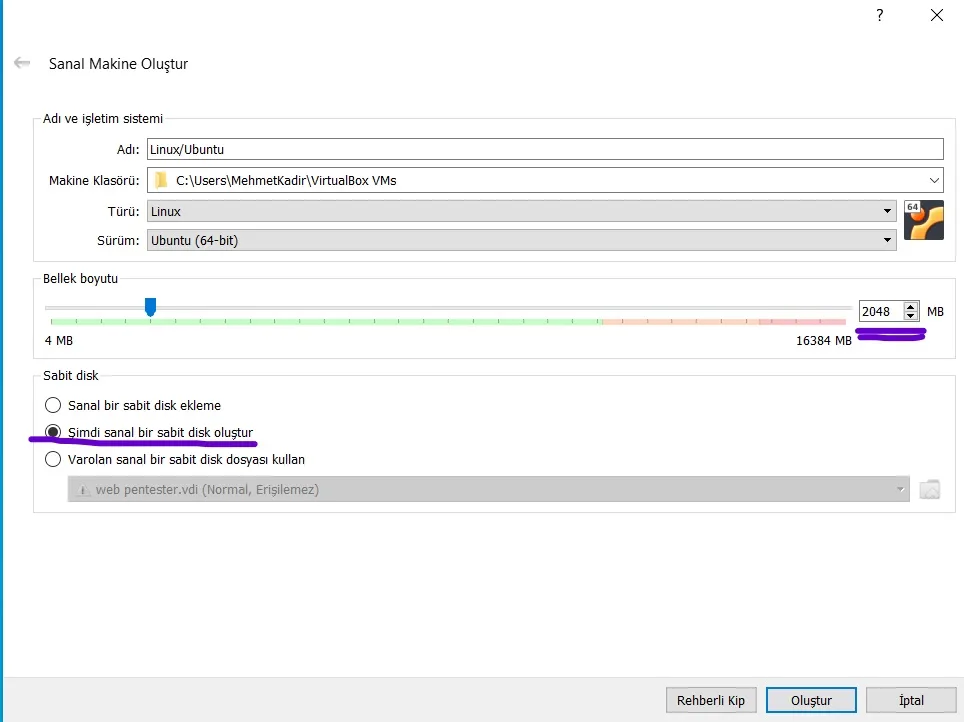
- I’m typing Ubuntu in the Name field. You can give it whatever name you want. Also, once you enter the name, the type and version fields are selected automatically.
- For the memory setting, you should decide based on your own computer’s memory. For example, if you have 8GB of RAM and you give 5GB of it to the virtual machine, you won’t be able to meet your physical computer’s RAM needs. My computer has 16GB of RAM, and I think 2GB of RAM will be enough. Of course, you can change it however you like.
- In the next section, we’re presented with 3 options; we select Create a virtual hard disk now and click the Next button.
Step 4 >>>
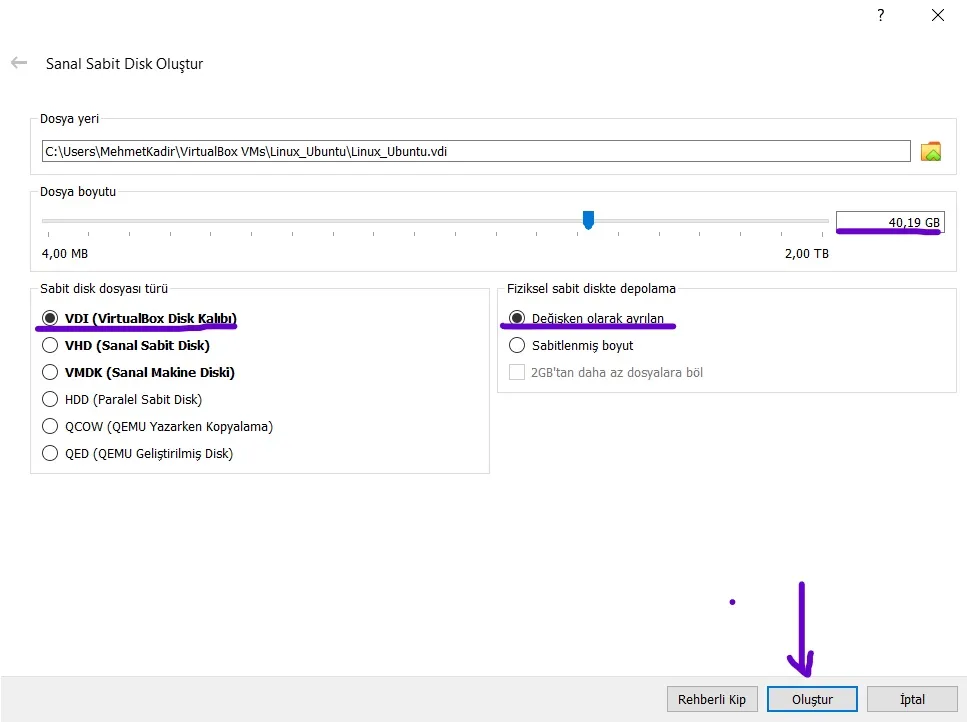
- On the screen that opens, we’re presented with 3 options. We choose the VDI (VirtualBox Disk Image) option.
- For the physical hard disk storage type, we choose the Dynamically allocated option.
- We specify the disk space we want to allocate for the virtual machine and click the Create button. I’m allocating 40GB of space.
Step 5 >>>
- Now let’s move on to another important step and make the necessary settings.
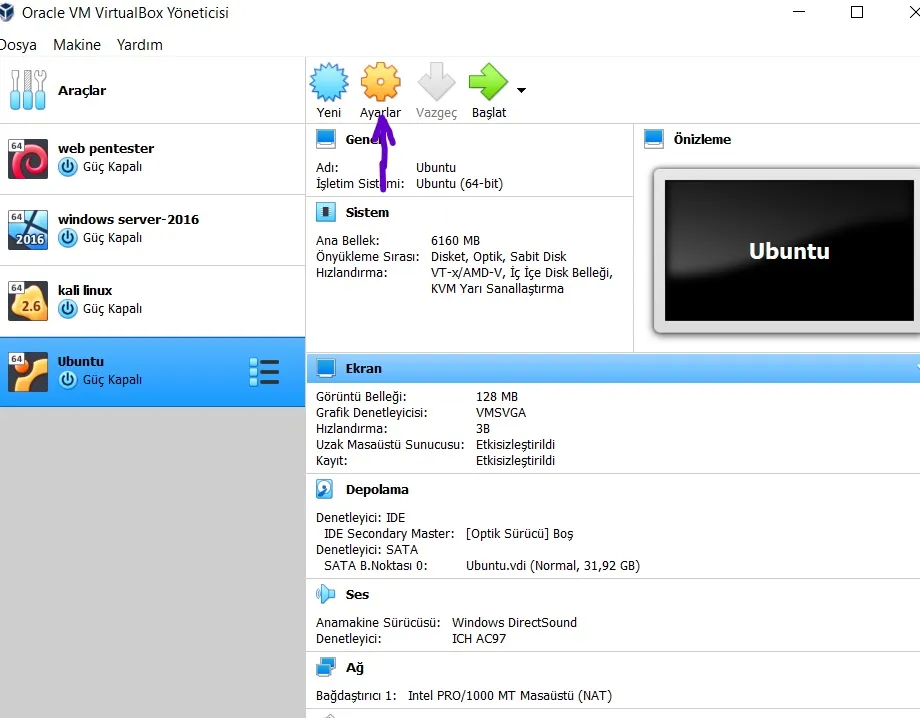
- We left-click on Ubuntu and click Settings in the menu that opens.
Step 6 >>>
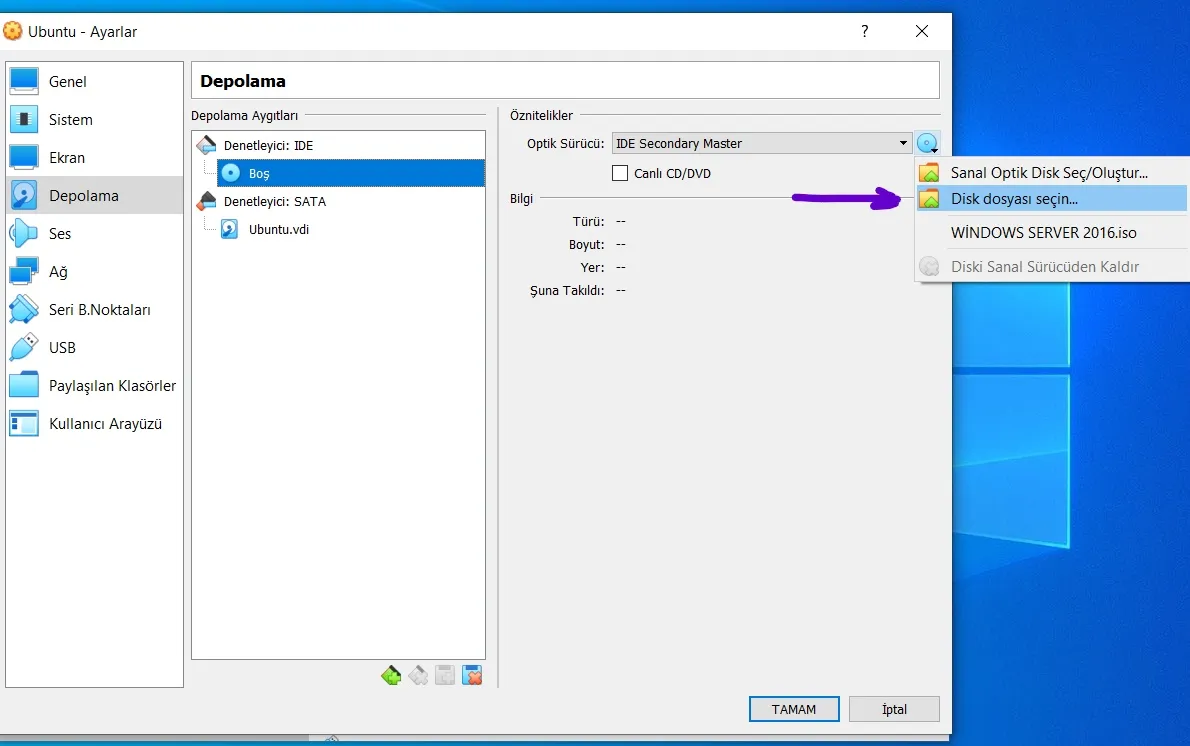
- We click on the Storage tab on the left. As you can see, the Controller: IDE section is currently empty,
- From the Optical Drive section on the right, we add the iso file of the Ubuntu operating system we downloaded.
Step 7 >>>
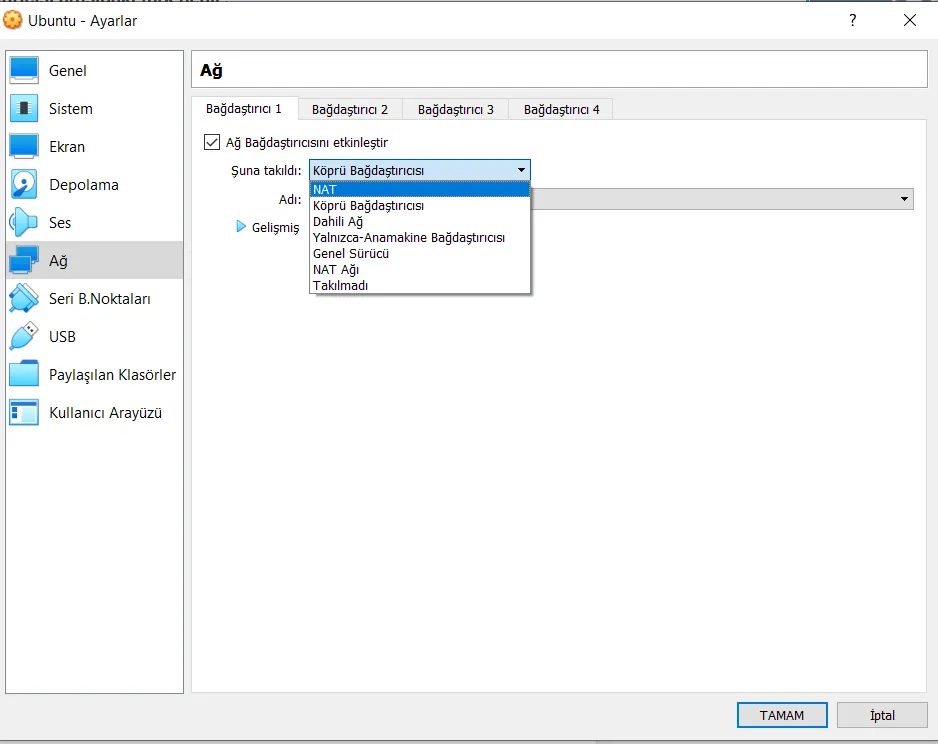
- Another setting will be the Network section, also found in the tab on the left. We click on the Network tab.
- We set the Attached to field to NAT. Normally, this already comes with the NAT option selected by default.
- I want to tell you about two connection types/adapters regarding the virtualization system. These are the “NAT (Network Address Translation)” and “Bridge” adapters.
- When a NAT connection is used, virtual machines can communicate with each other since they’re on the same network, and they can access the internet through our host machine. In other words, with a NAT connection, internet access is only provided through the host machine.
- With the “Bridge” connection type, virtual machines get direct access to the host machine’s ethernet, obtain a real IP on that network, communicate with each other, and access the internet at the same time. While NAT provides ethernet access through the host machine, a Bridge connection provides direct ethernet access.
Step 8 >>>
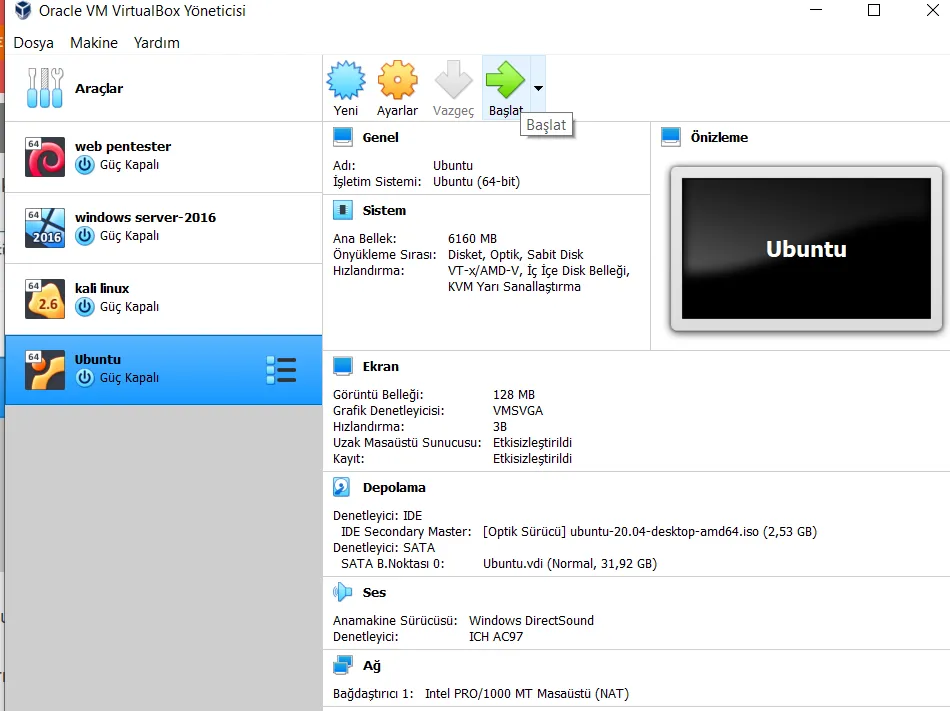
- Alright everyone, we’ve finished the Settings section. As you can see, our Ubuntu operating system is set up.
- Now we click the start option and start it up.
- After starting the virtual machine, you’ll need to provide answers such as language settings, time settings, and your region. I think you can handle those parts on your own.
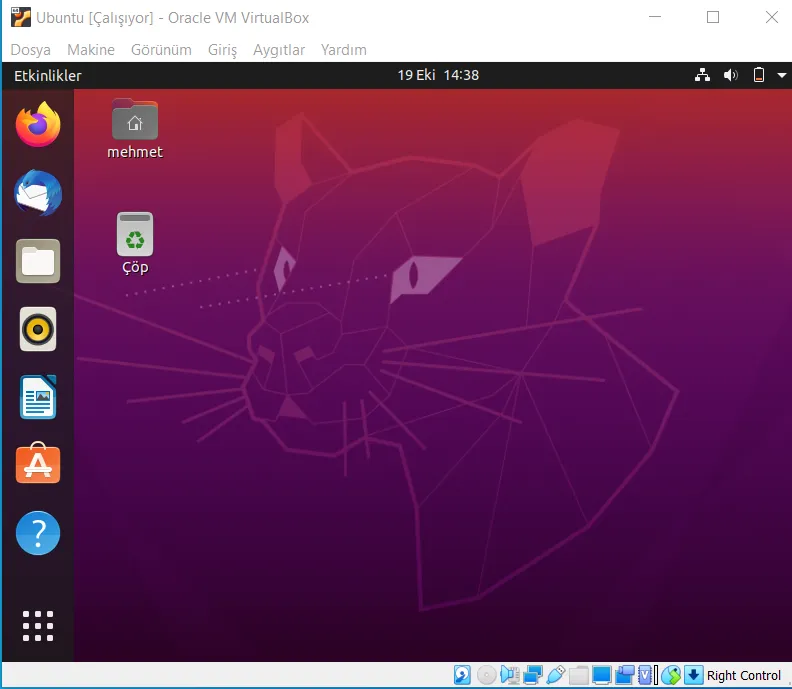
- And finally, when Ubuntu first starts up, we’re greeted with an interface screen like this. I think you’ll like it.
Thank you, dear readers, for supporting me by reading my articles. See you in my new articles.